The A/B Testing feature in Subotiz helps merchants compare different versions using real visitor traffic and business data. Before launching an experiment, configure your Experiment Groups, complete the required SDK Integration, and define traffic allocation and experiment metrics to collect reliable data and make data-driven decisions.
Preparing to Create an Experiment
Before creating an experiment, complete the following three preparation steps.
-
Understand How A/B Testing Works: A/B Testing uses controlled experiments to measure the impact of changes. Every experiment must include at least one Control Group and one Experiment Group.
- The Control Group continues using the current page, feature, or business logic.
- The Experiment Group uses the new version being tested.
- Subotiz automatically assigns visitors to experiment groups and collects experiment data.
- Developers are responsible for displaying the appropriate page, content, feature, or business logic based on the group assignment returned by the SDK.
-
Define What to Test: Determine what the experiment is intended to validate.Subotiz A/B Testing supports merchant-hosted pages and business workflows, including:
- Subscription pages with different pricing options or layouts
- Product page UI
- Landing pages
- Registration flows
- Checkout flows
- New feature experiences
-
Complete the SDK Integration: The pages included in the experiment must integrate the Subotiz A/B Testing SDK. The SDK is required to assign visitors to experiment groups and collect experiment data. After the initial integration, the same SDK setup can be reused for future experiments.
- Integrate the SDK: Add the A/B Testing SDK to every page included in the experiment. Without the SDK, Subotiz cannot assign visitors or collect experiment data.
- Initialize the SDK: Generate a stable Experiment User ID, retrieve the visitor's experiment group, and automatically report experiment exposure.
- Display the assigned version: Use the experiment group returned by the SDK to display the corresponding page, feature, or content.
- Report experiment data: Use the SDK to report key user actions so Subotiz can calculate and compare experiment results across groups.
For integration steps, SDK parameters, and sample code, refer to the Subotiz A/B Testing SDK documentation.
Creating an Experiment
- Open the experiment page: Sign in to the Subotiz Admin, go to Data > A/B Testing, then click Create experiment.
- Enter the experiment name: Use a clear, descriptive name that makes the experiment easy to identify.Examples:
- Checkout Page Free Trial Experiment
- New Checkout Flow Experiment
- Registration Page CTA Button Experiment
The experiment name is only displayed in the Subotiz Admin and is never shown to visitors.
- Select the experiment subject: Under Subject, select Custom.
- Set the end conditions: Enter the target number of experiment users. The minimum value is 500.To limit how long the experiment can run, enable Maximum duration and specify a duration between 1 and 365 days.Choose an appropriate sample size based on your website traffic. In general, experiments with more participants produce more reliable results.The experiment automatically ends when either of the following conditions is met:
- The target number of experiment users is reached.
- The maximum duration is reached.
- Select the audience: By default, all eligible visitors can participate in the experiment. To test a specific audience, enable Custom Audience.
- Configure the target audience: After enabling audience targeting, add at least one filtering rule.The following filters are currently supported:
- Country: Match visitors based on the country or region associated with their IP address. Search by country name or country code.
- Traffic Source: Match visitors using the traffic source value passed through the SDK. The value entered here must exactly match the value sent by your application, such as Facebook.
- Device: Run separate experiments for desktop and mobile visitors.
Multiple rules use AND logic. Visitors must satisfy every configured condition to enter the experiment.
- Enter the experiment description: Describe the purpose of the experiment and the key differences between the Control Group and each Experiment Group.Providing a detailed description gives AI Insights more context and can improve the relevance of the experiment analysis.
Setting Up Experiment Groups and Traffic Allocation
After completing the basic experiment settings, configure the experiment groups and traffic allocation.
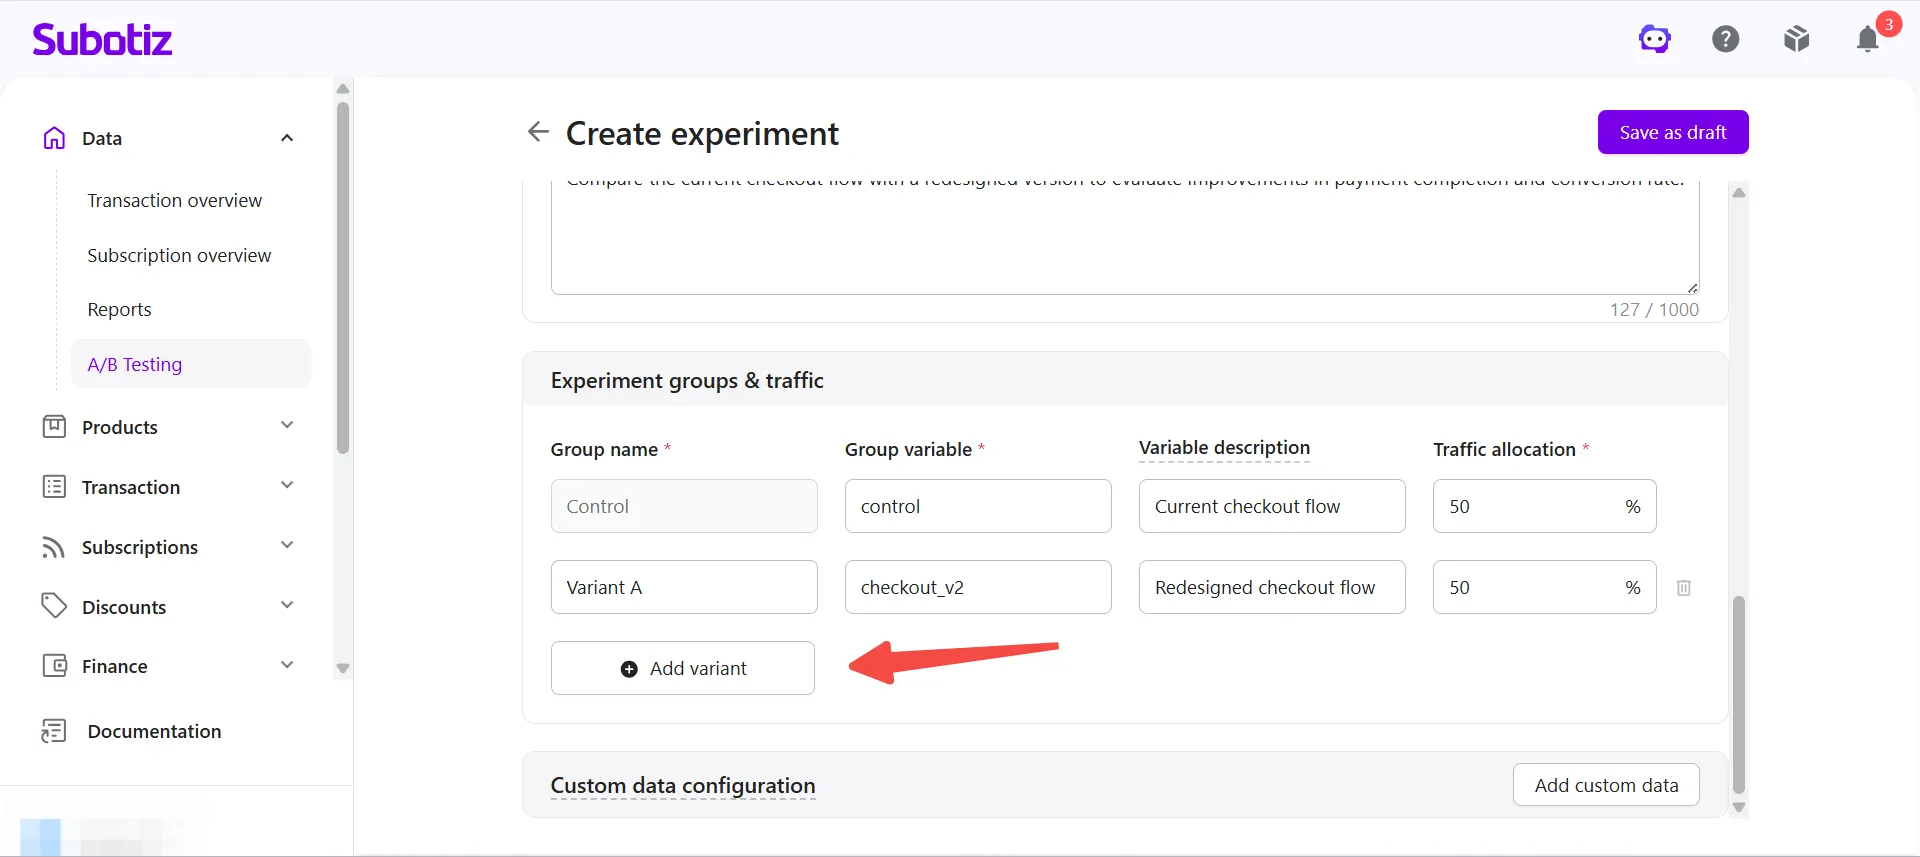
Every experiment must include at least one Control Group and one Experiment Group. Subotiz automatically assigns eligible visitors to each group based on the configured traffic allocation.
-
Name each experiment group: Enter a clear name for every group, such as:
- Control Group
- Experiment Group A
- Experiment Group B
-
Configure the group variable: Enter a unique group variable for each experiment group. Developers use this value to identify the assigned group and display the corresponding experiment version.Use lowercase letters, numbers, and underscores whenever possible. Each experiment group must use a unique group variable.
Example:
Group name |
Group variable |
|---|---|
Control Group |
control |
Variant A |
trial_7days |
Variant B |
no_trial |
Before launching the experiment, confirm the group variables with both the development and operations teams. The page logic, SDK configuration, and experiment reporting must all use the same values.
-
Enter the group description: Add a short description for each experiment group to make the configuration easier to understand.Examples:
- Current page version
- 7-day free trial added
- Updated CTA button copy
-
Set the traffic allocation: Assign a percentage of eligible visitors to each experiment group.The combined traffic allocation across all experiment groups must equal 100%.Example with two groups:
- Control Group: 50%
- Experiment Group A: 50%
Example with three groups:- Control Group: 40%
- Experiment Group A: 30%
- Experiment Group B: 30%
- Add another experiment group: Click Add Variant to create another experiment group, then configure its name, group variable, description, and traffic allocation.
Adding Custom Data
Custom data lets you measure user behaviors and business outcomes that Subotiz cannot collect automatically, such as completed registrations, button clicks, form submissions, and feature usage.
Report these events through the SDK, then compare the results across experiment groups.
Subotiz supports two types of custom data:
- Direct Data
- Derived Data
Configuring Direct Data
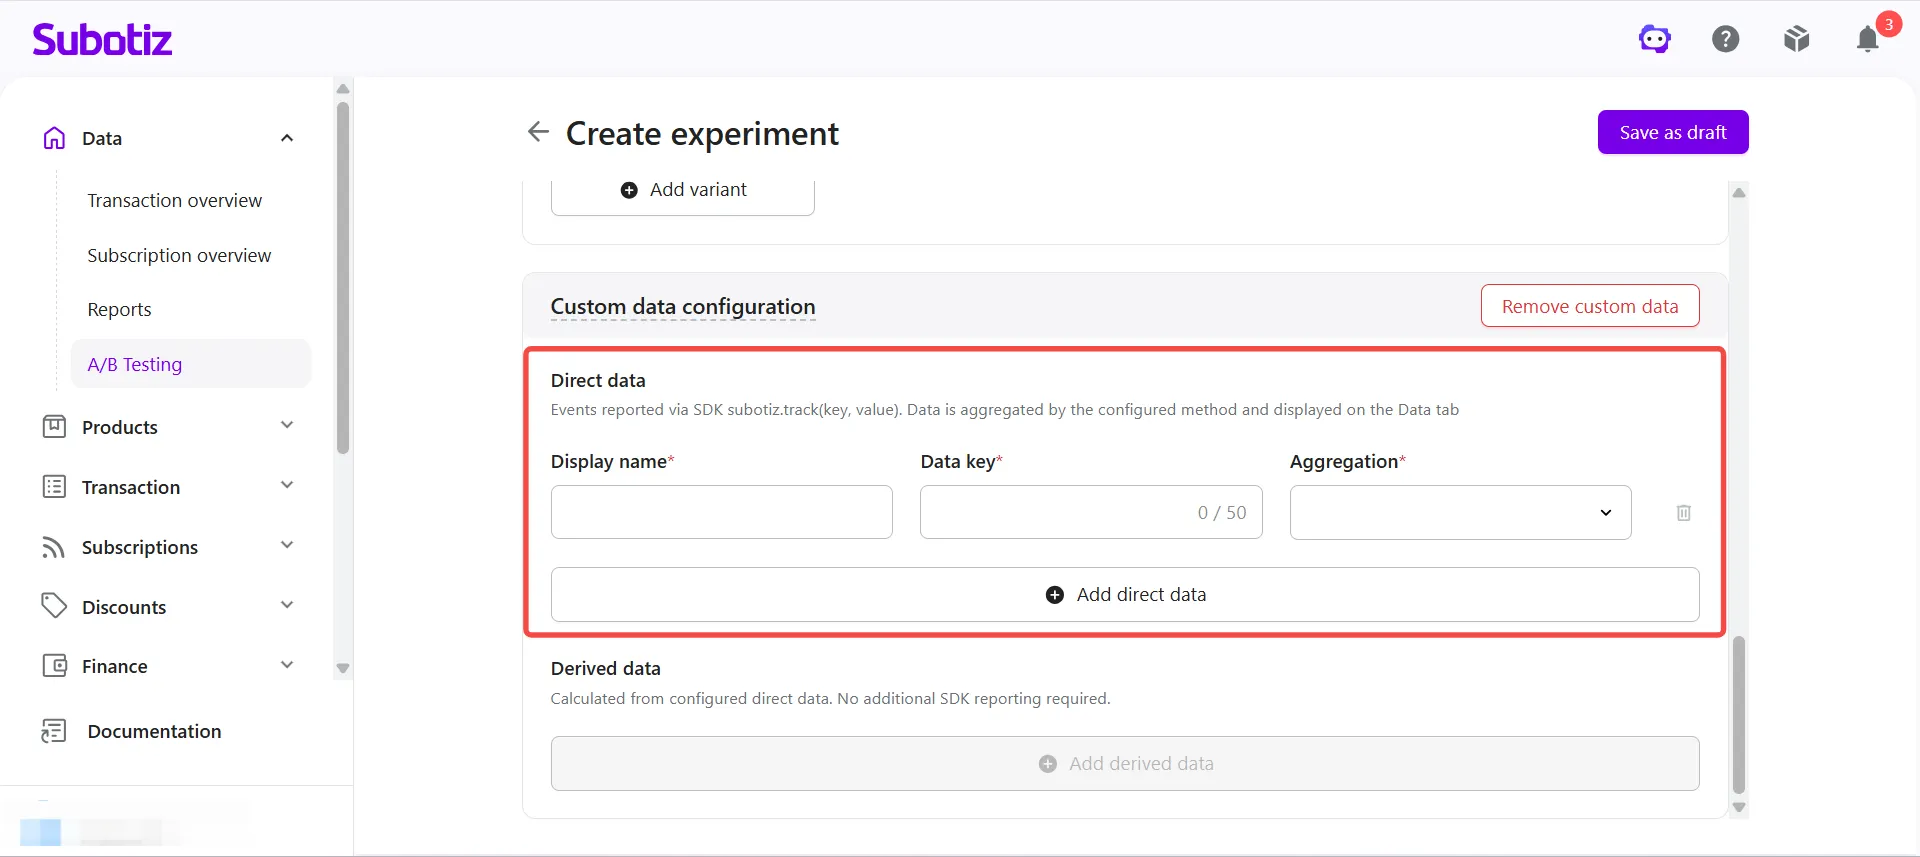
Direct Data represents raw events or numeric values reported through the SDK.
Common examples include:
- Registration completed
- Button clicked
- Form submitted
- Order amount
Subotiz calculates results for each experiment group using the aggregation method you select.
-
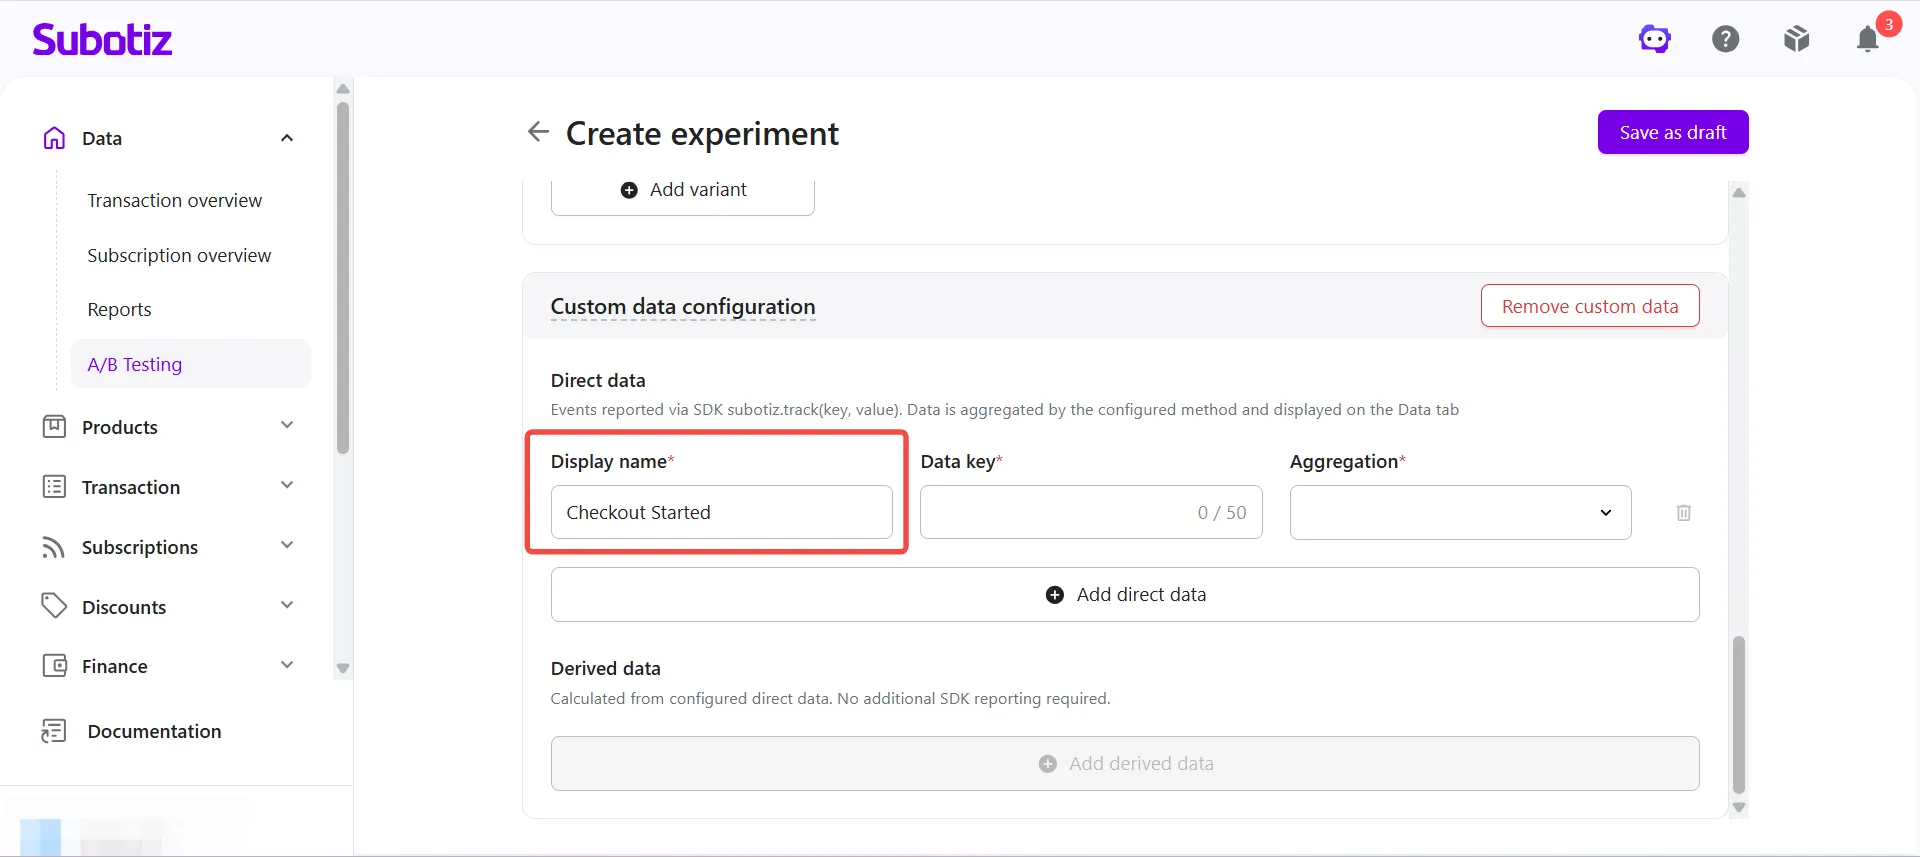
Enter the display name: Enter the name shown in the Subotiz Admin, such as:
- Registration Completed
- Order Amount
-
Enter the Data Key: Enter the unique identifier used when reporting the event through the SDK.Examples:
signup_completedorder_amountcta_click
The Data Key must exactly match the value reported through the SDK. Otherwise, Subotiz cannot collect or calculate the data.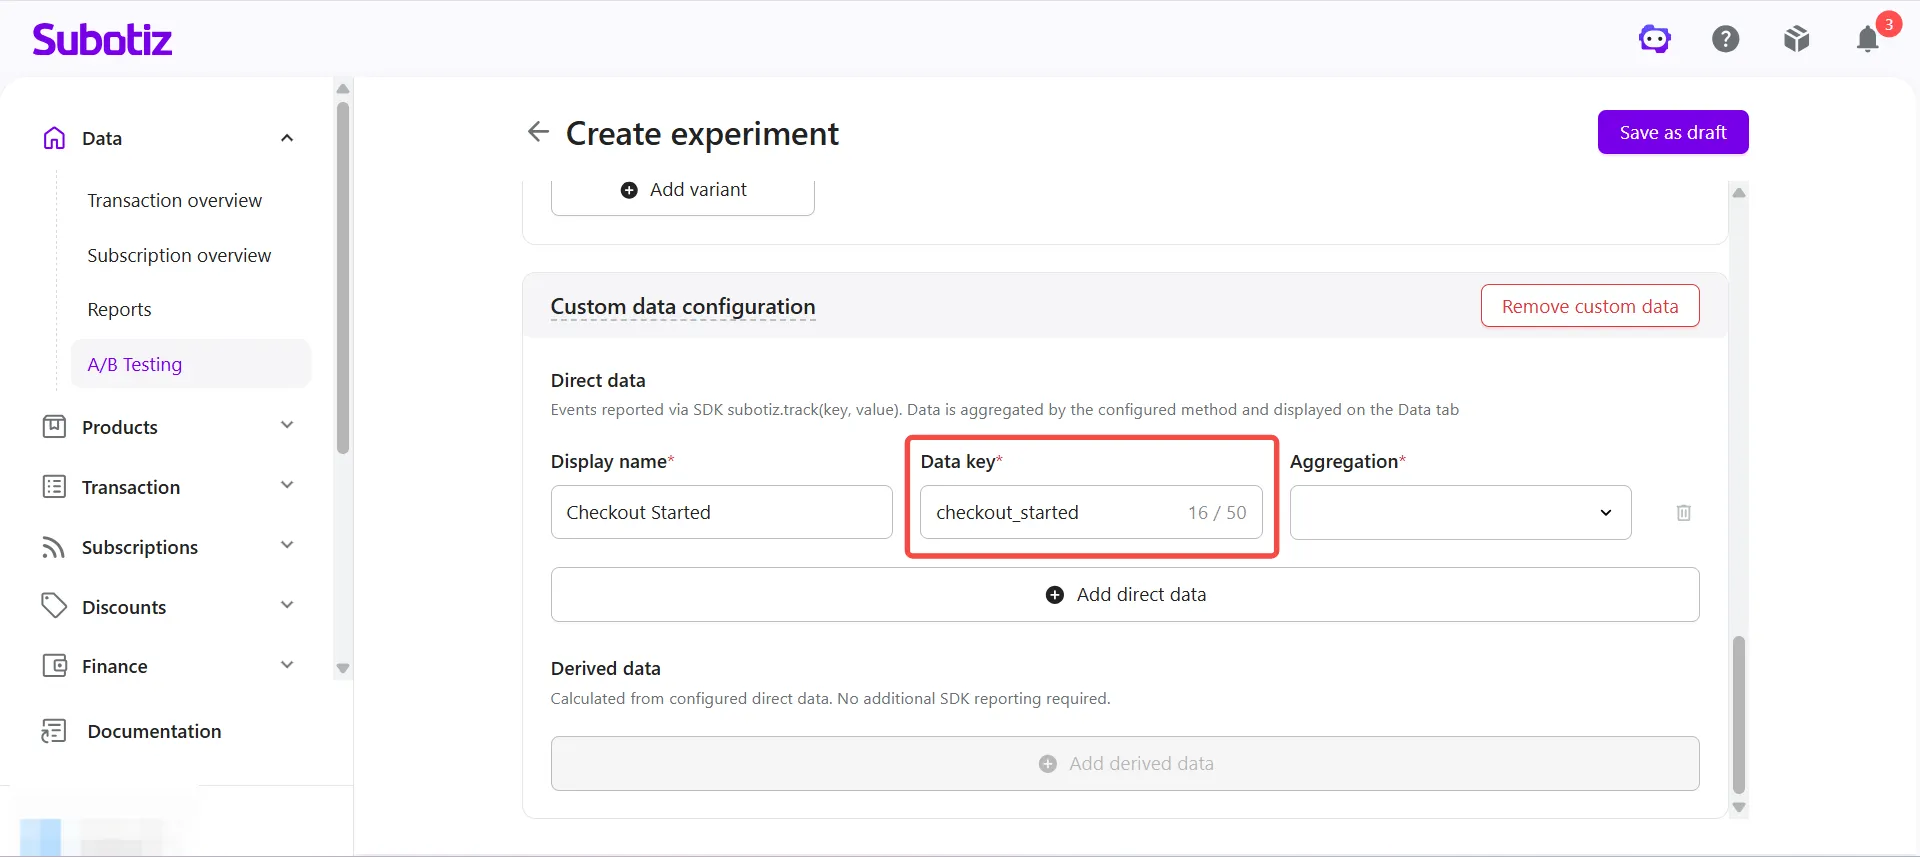
-
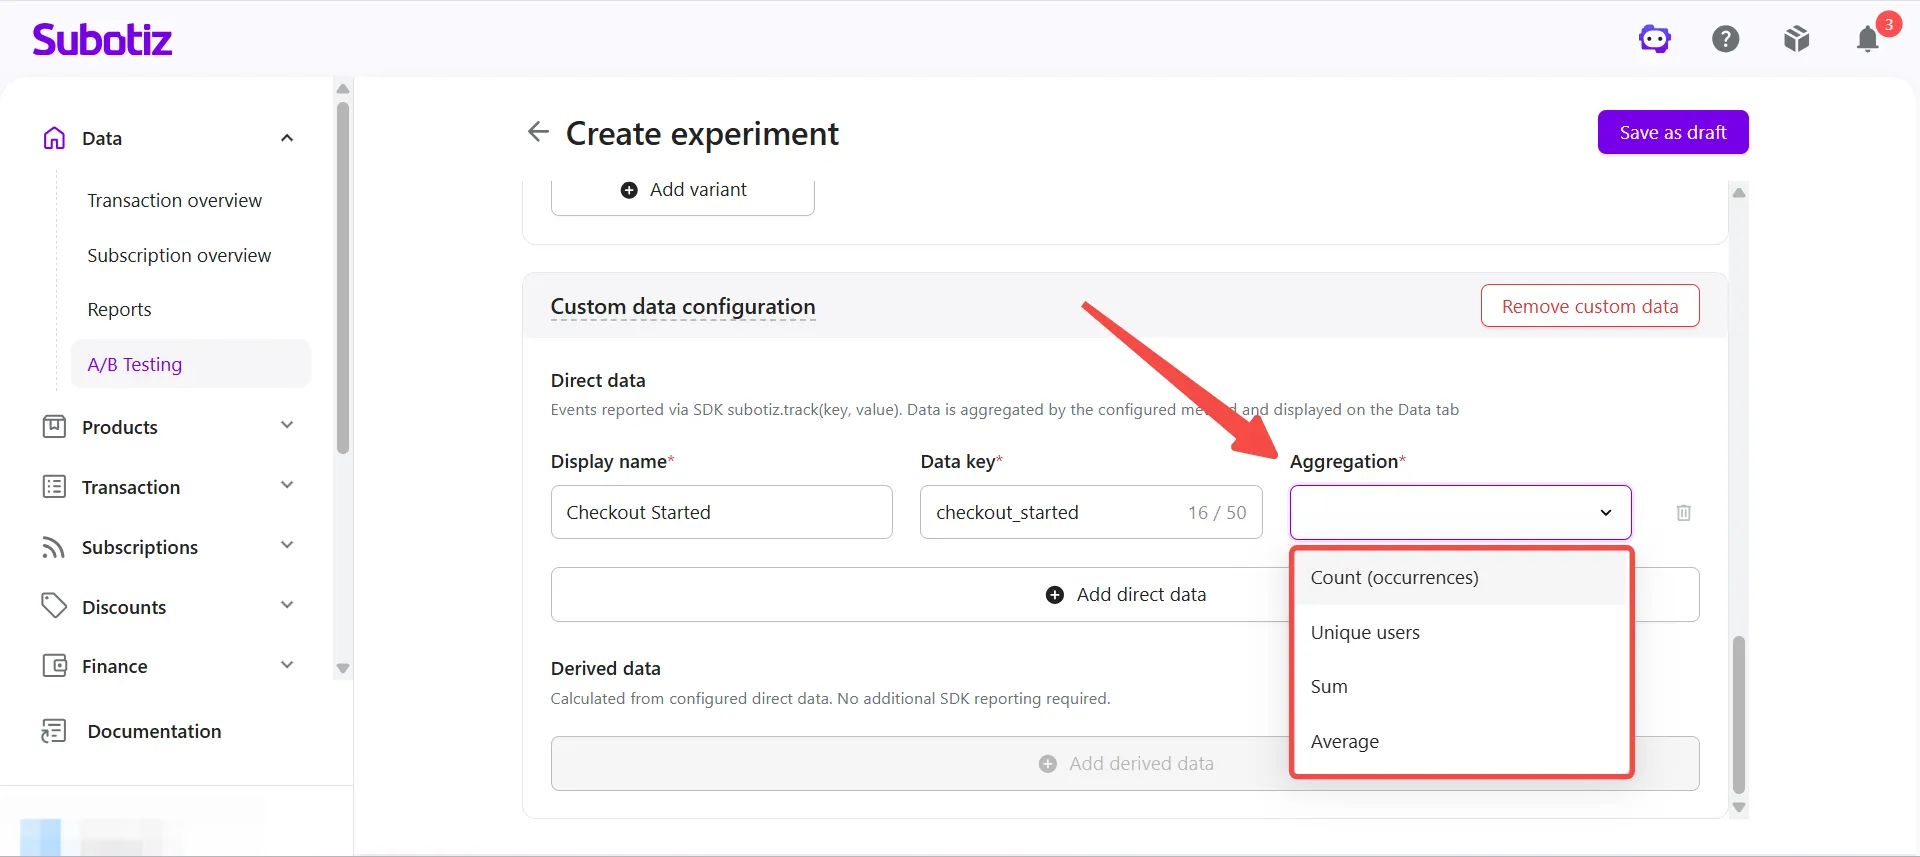
Select the aggregation method: Choose the aggregation method that matches the reported data.Supported aggregation methods include:
- Count: Calculates the total number of times an event occurs, such as total button clicks.
- Unique Users: Counts the number of unique users who trigger an event, such as users who complete registration.
- Sum: Adds all reported numeric values, such as total order value.
- Average: Calculates the average of all reported numeric values, such as average order value.
-
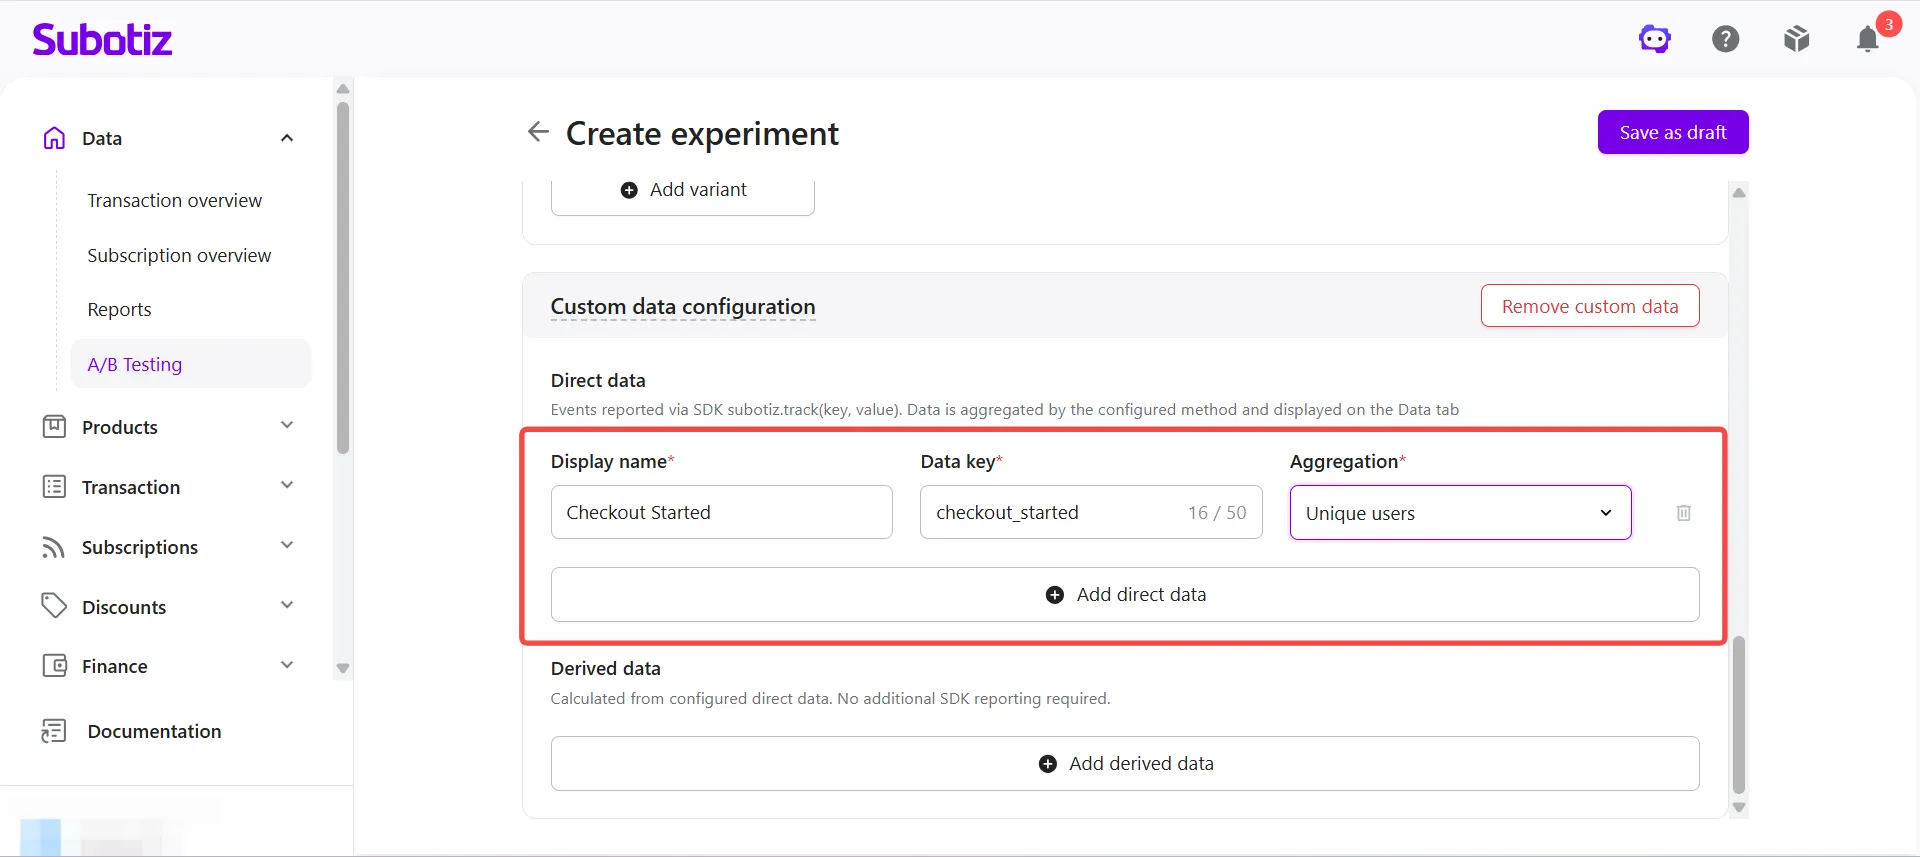
Review Common Configuration ExamplesThe following examples show common Direct Data configurations.
Display name |
Data key |
Aggregation |
|---|---|---|
Checkout Started |
checkout_started |
Unique users |
CTA Clicked |
cta_click |
Count |
Order Amount |
order_amount |
Sum |
Average Order Value |
order_amount |
Average |
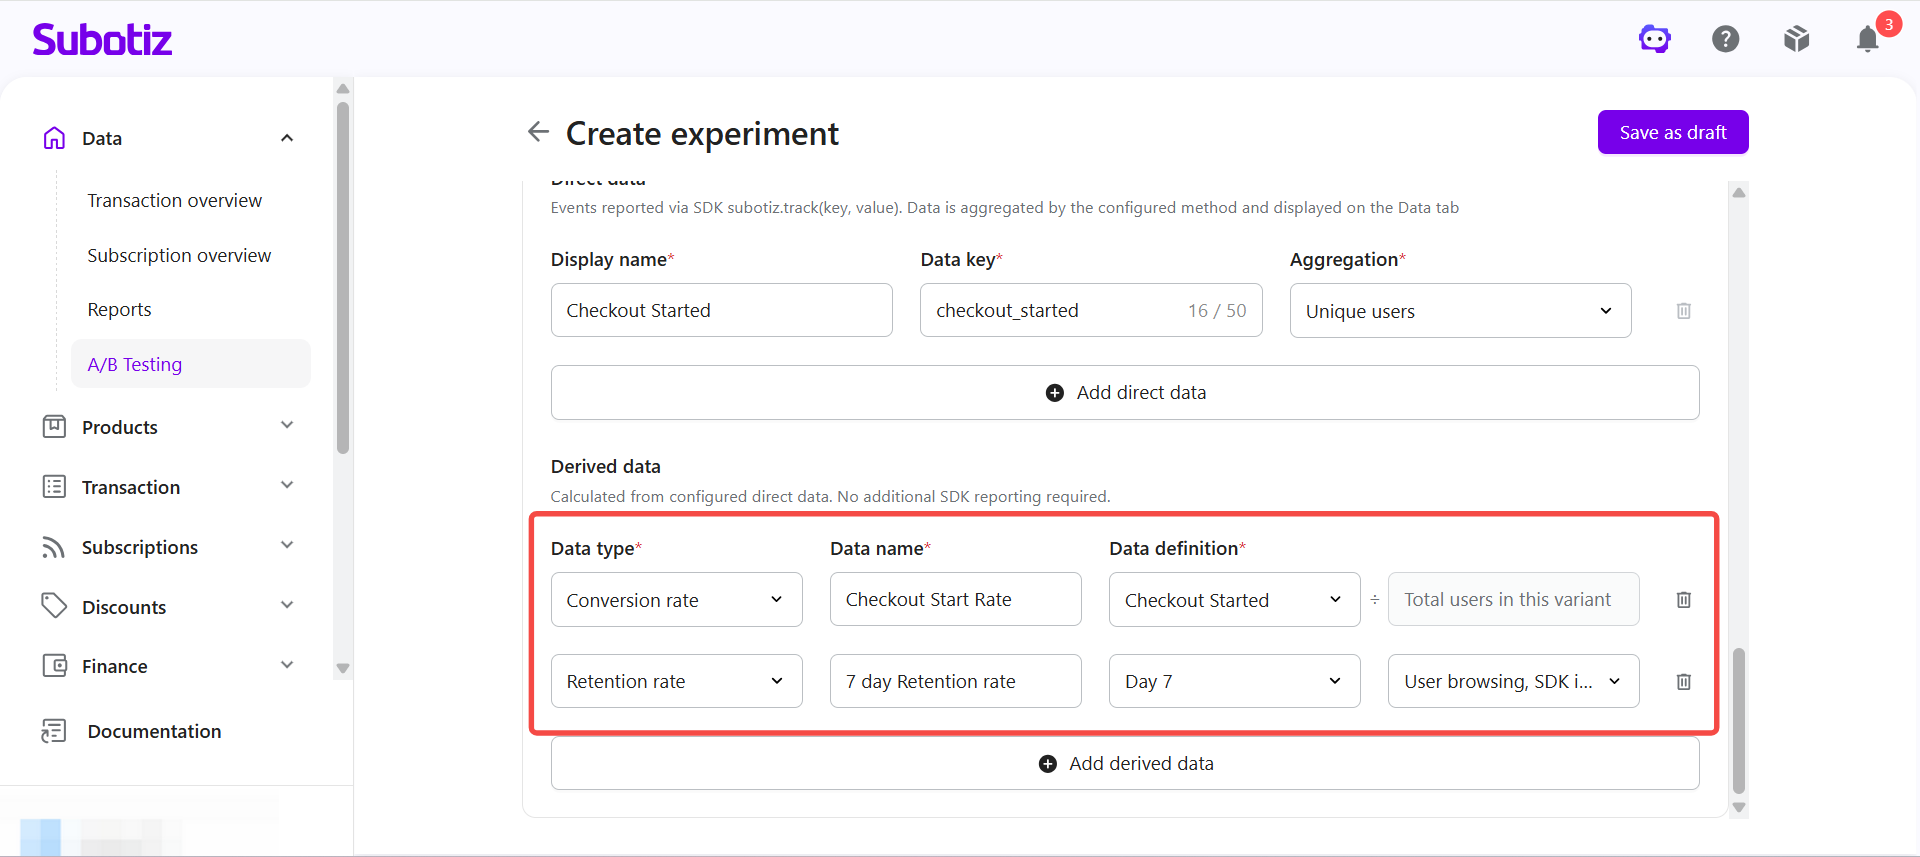
Configuring Derived Data
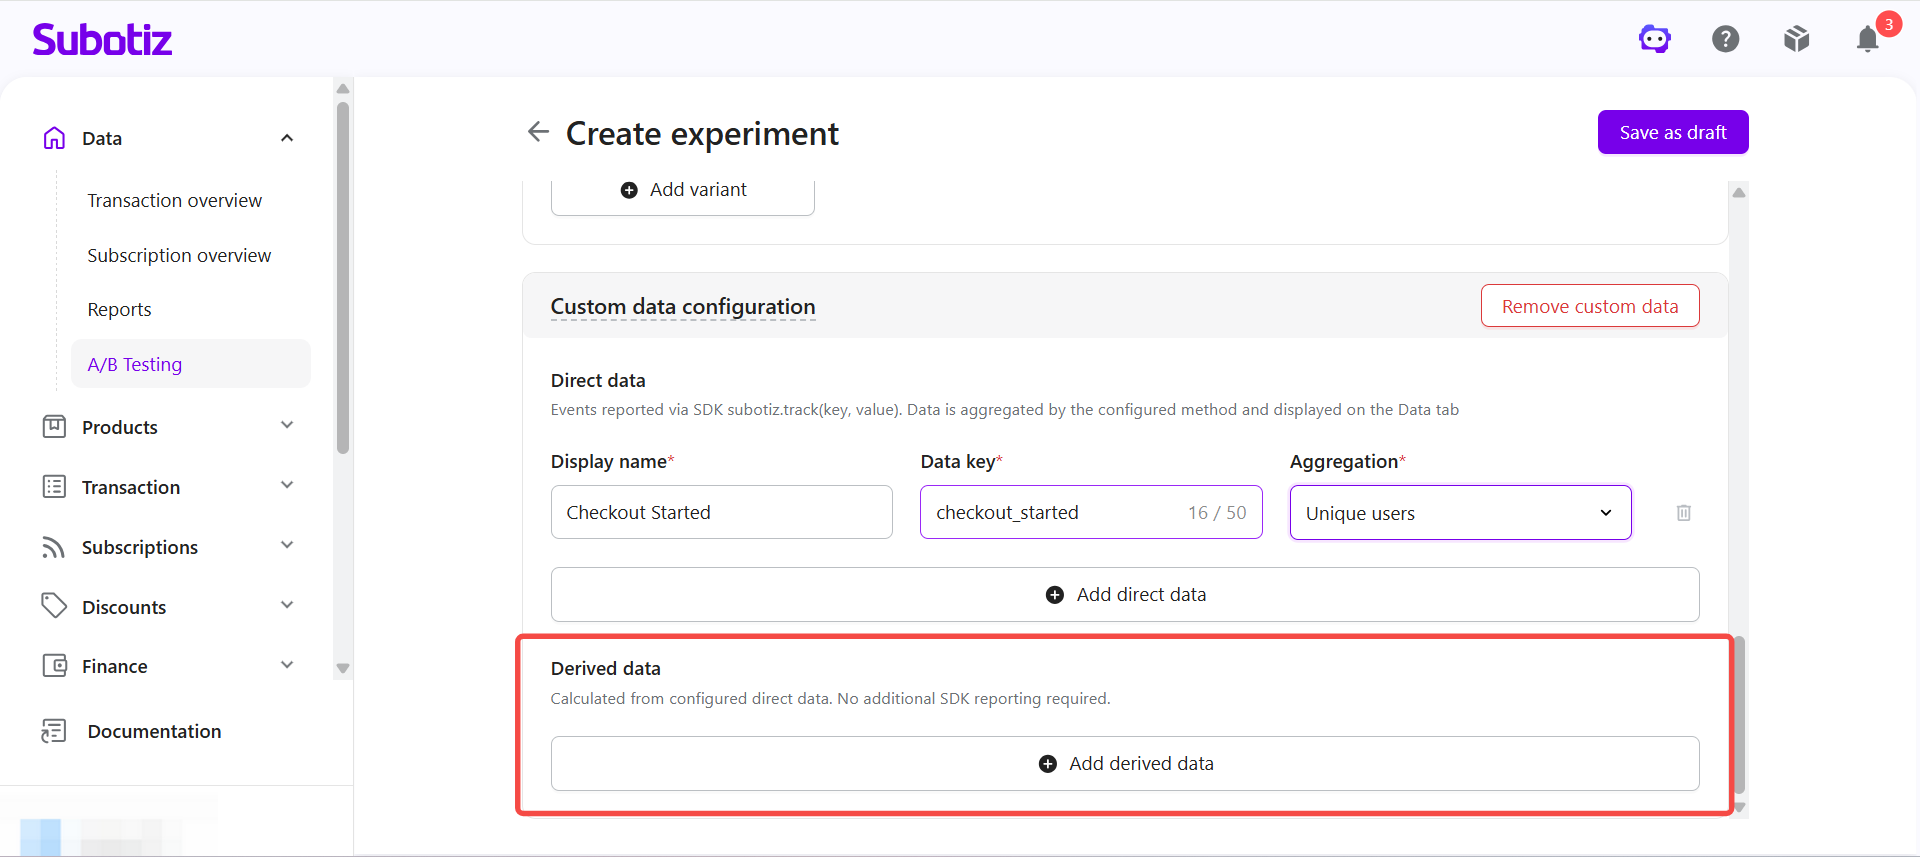
Derived Data is calculated automatically from existing Direct Data. Developers do not need to report additional SDK events.
-
Add Direct Data: Configure at least one Direct Data item before creating Derived Data.
-
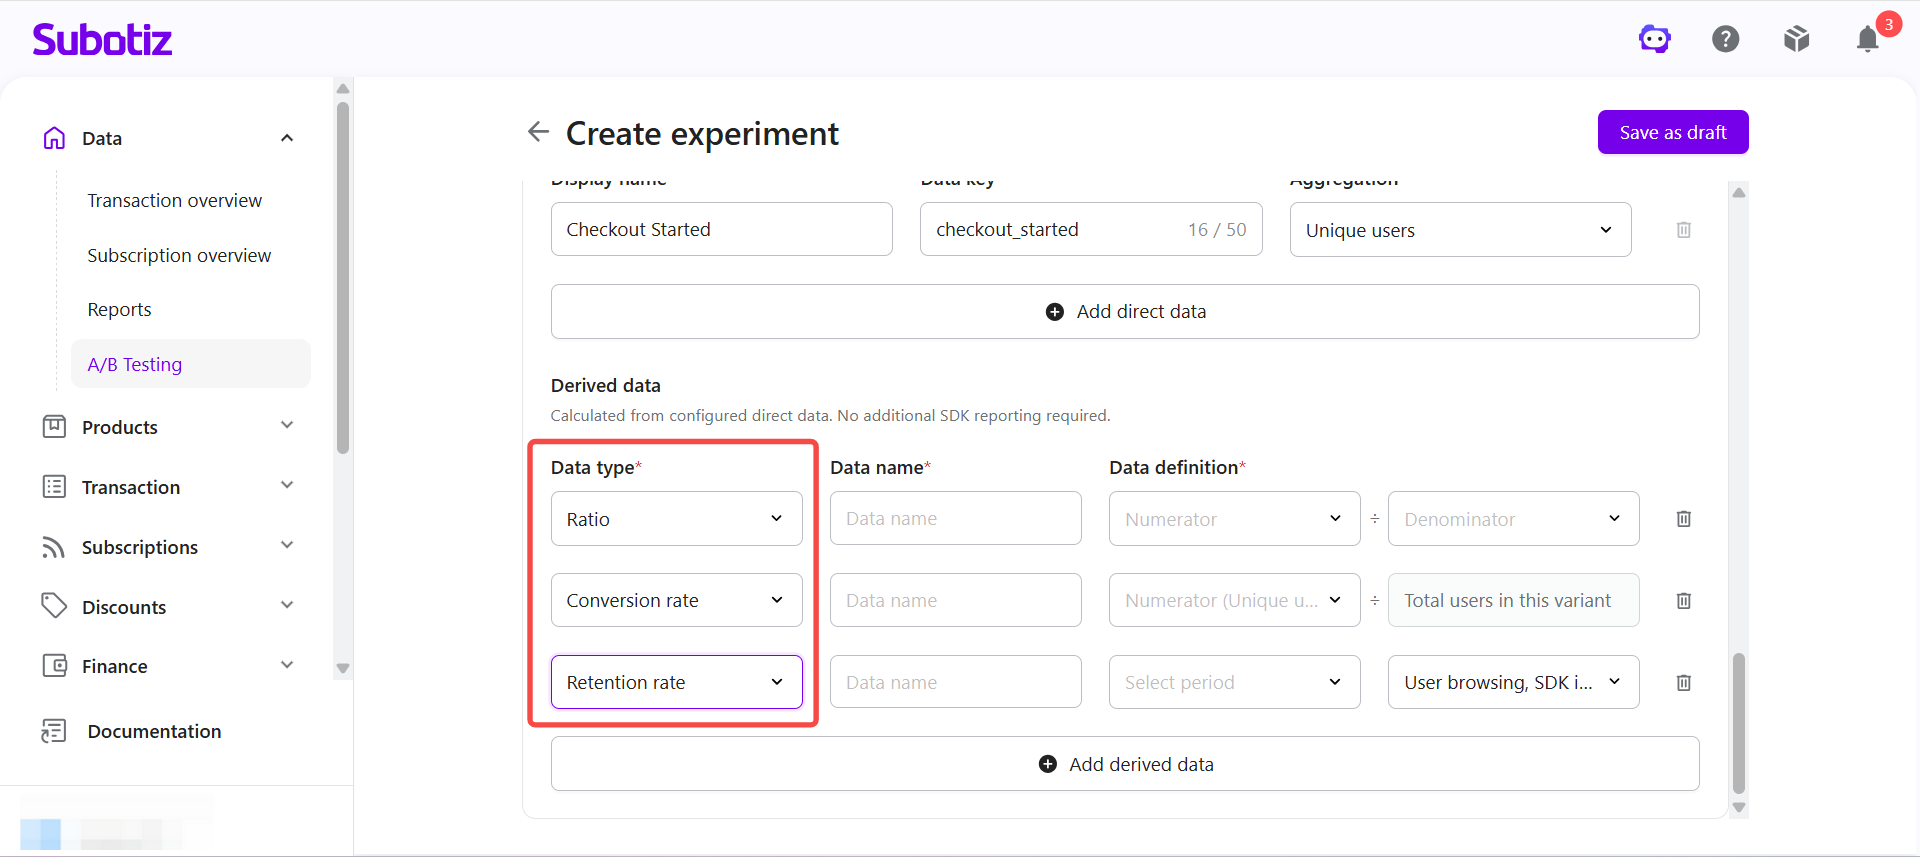
Select the Derived Data type: Subotiz currently supports the following types.
-
Ratio: Select the Direct Data used as the numerator and denominator.For example:Registration Completed ÷ Page ViewedSubotiz automatically calculates the ratio between the two metrics.
-
Conversion rate: Select the Direct Data used as the conversion event.Subotiz automatically uses the total number of users in the experiment group as the denominator.Common examples include:
- Registration Conversion Rate
- Payment Success Rate
-
Retention rate: Select a retention period, then choose the Direct Data used as the measurement basis.Retention Rate represents the percentage of users who perform a specified action for the first time and then perform the same action again after the selected retention period.Subotiz automatically calculates the retention rate based on the selected retention period and Direct Data.Supported retention periods include:
- Next-day Retention (1 day)
- 7-day Retention
- 30-day Retention
- Custom Number of Days
-
- Choose Metrics Based on Your Experiment Goal: Configure metrics that match the objective of your experiment.
Experiment objective |
Recommended metrics |
|---|---|
Page content optimization |
Clicks, unique users who clicked, form completion rate |
Registration flow optimization |
Users completing each step, step conversion rate |
New feature testing |
Feature usage rate, average uses per user |
Promotion testing |
Coupon click rate, order amount, promotion page engagement |
User engagement |
Next-day retention, 7-day retention, 30-day retention |
-
Save the experiment: Click Save as Draft after completing the experiment configuration.While the experiment remains in Draft status:
- The experiment configuration can still be edited.
- Visitors are not assigned to experiment groups.
- Experiment data is not collected.
Before activating the experiment, review the experiment subject, audience, experiment groups, traffic allocation, group variables, and data configuration to make sure everything is configured correctly.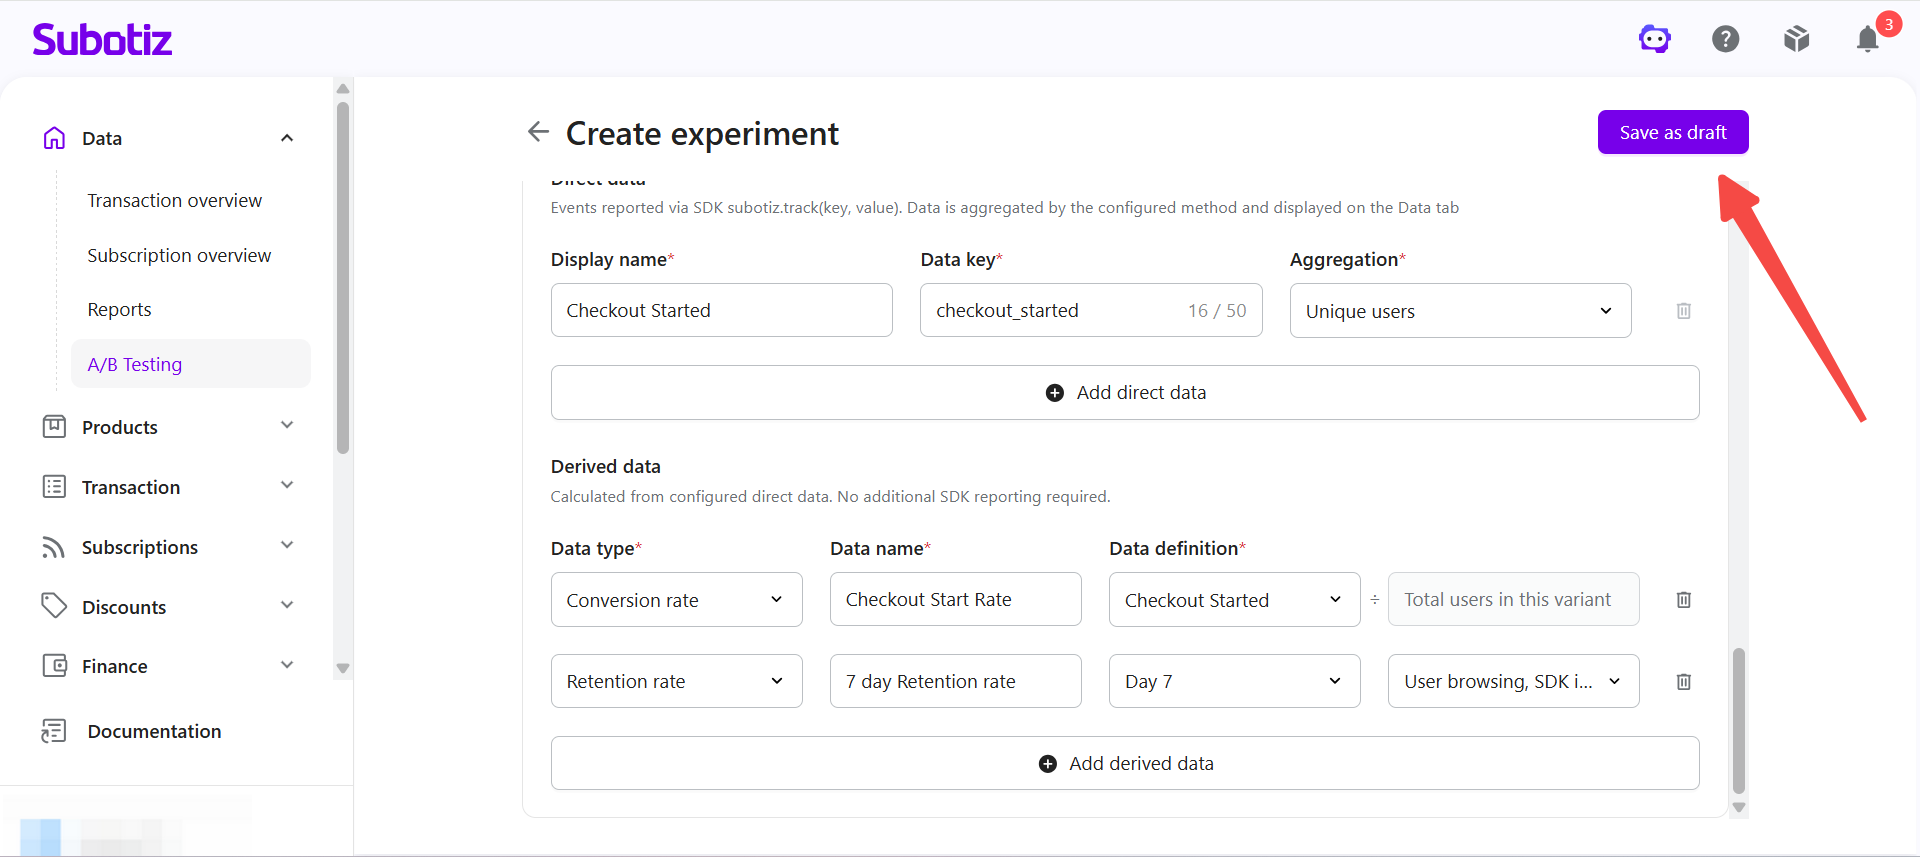
Best Practices
- Review the experiment before launch: Verify the experiment objective, audience, experiment groups, traffic allocation, and metrics before activating the experiment.
- Use consistent group variables: Confirm each group variable with your development team before implementation. The SDK, page logic, and experiment reporting must all use the same values.
- Verify Data Keys: Make sure every Data Key exactly matches the value reported through the SDK. Any mismatch prevents Subotiz from collecting the corresponding metric.
- Review traffic allocation: Confirm that the combined traffic allocation across all experiment groups equals 100%.
- Describe the experiment: Record the experiment objective and the differences between experiment groups. A complete description provides better context for future reviews and AI Insights.
- Review the draft: Confirm that all settings are correct before activating the experiment and starting traffic allocation.
Creating an experiment requires defining the testing objective, completing the SDK integration, and configuring the audience, experiment groups, traffic allocation, and experiment metrics.
After reviewing the configuration, save the experiment as a draft and activate it when the implementation is ready. A well-planned experiment helps ensure reliable data and more meaningful results.
Appendix: Experiment Identifiers for Developers
The following identifiers are primarily intended for SDK implementation and troubleshooting. Most merchants do not need to configure these values manually.
Identifier |
Description |
|---|---|
Experiment User ID |
Generated automatically by the SDK based on the visitor’s device cookie. It keeps the same visitor in the same experiment group across visits. |
Customer ID |
The unique identifier Subotiz uses to recognize a customer on the platform. |
External Customer ID |
The customer identifier passed through payer_id when creating a Checkout Session. It connects the Subotiz customer record with the merchant’s own user record. |
Related Articles