The Custom Domain setup in Subotiz allows merchants to connect their own branded subdomain to replace the system default domain. This ensures checkout pages, payment links, and customer portals are all hosted under a verified, SSL-secured domain that reflects your brand identity.
Add a Custom Domain
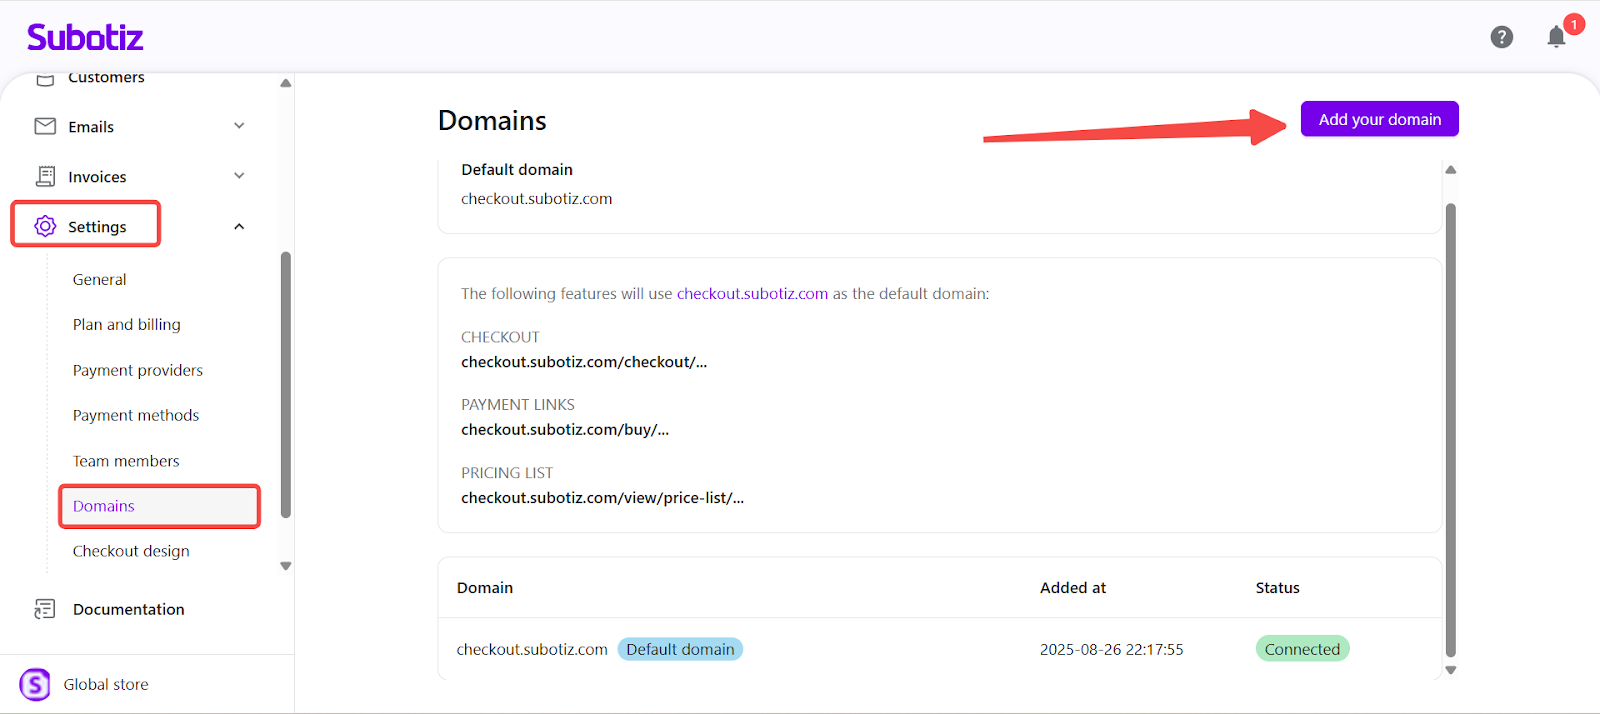
- Add a domain: Go to Settings > Domains > Add your domain.
- Enter subdomain: Input your desired subdomain (for example,
billing.yourbrand.com).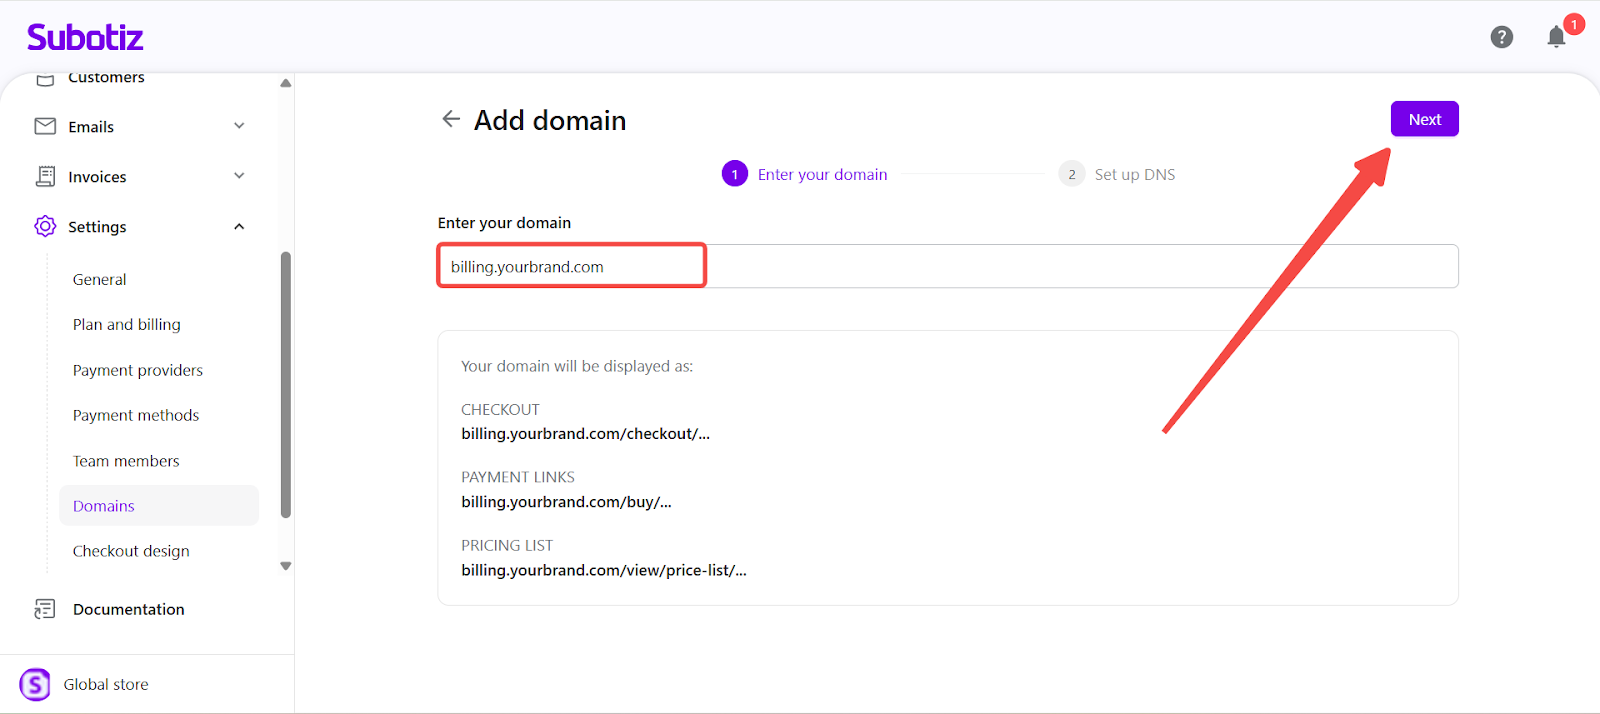
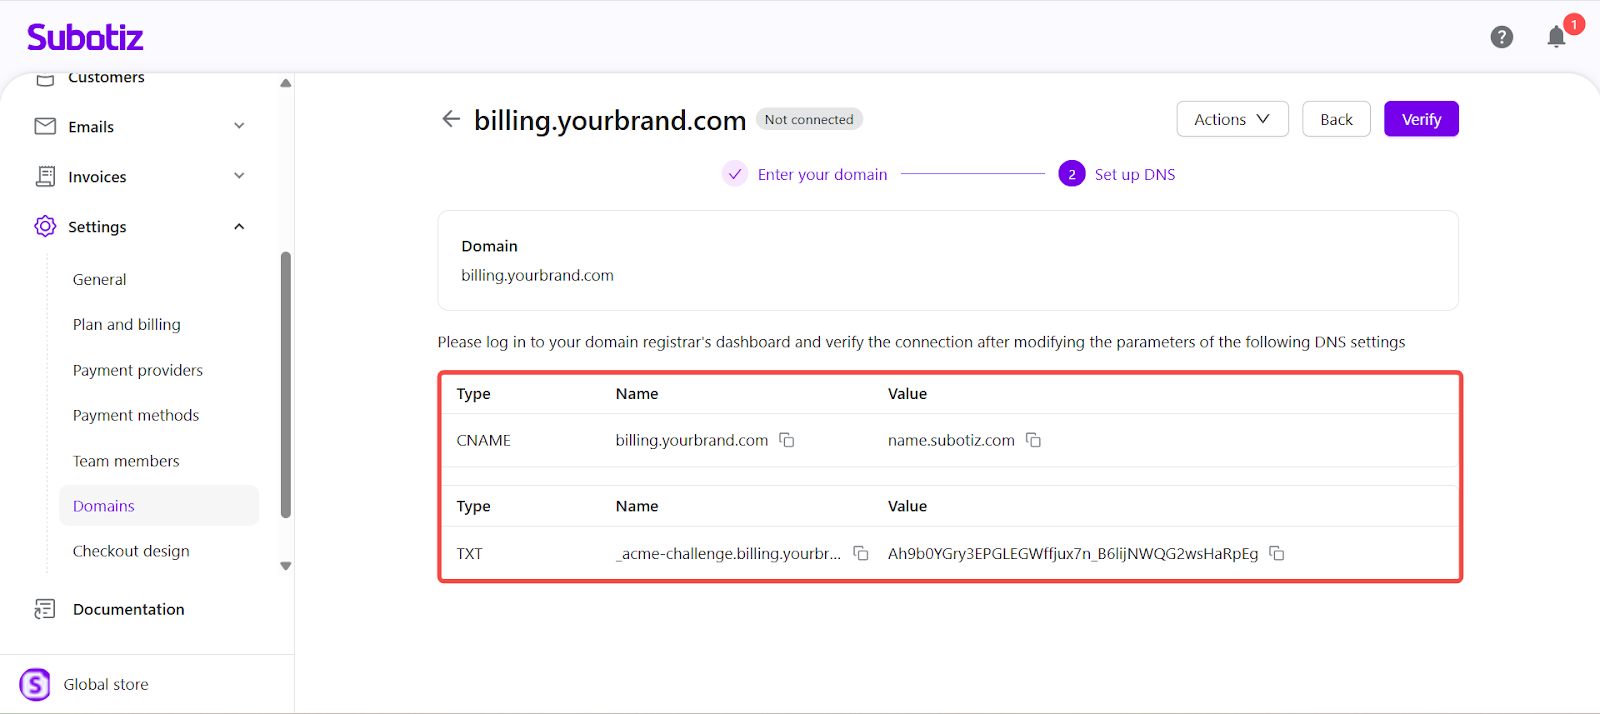
- Confirm domain ownership: The system will generate two DNS records — a CNAME record and a TXT record.
- CNAME record: Used to point your subdomain to the Subotiz domain host.
- TXT record: Used to verify domain ownership.
Set Up DNS
- Update your DNS provider: Go to your DNS management platform (e.g., Cloudflare, GoDaddy, Namecheap) and add the records provided by Subotiz.
Record Type | Name | Value | Purpose |
|---|---|---|---|
CNAME | billing | name.subotiz.com | Points subdomain to Subotiz host |
TXT | (auto-generated) | (unique verification value) | Confirms ownership |
Note: DNS propagation can take several hours depending on your DNS provider. Wait until your DNS updates are fully propagated before verifying in Subotiz.
Verify and Activate
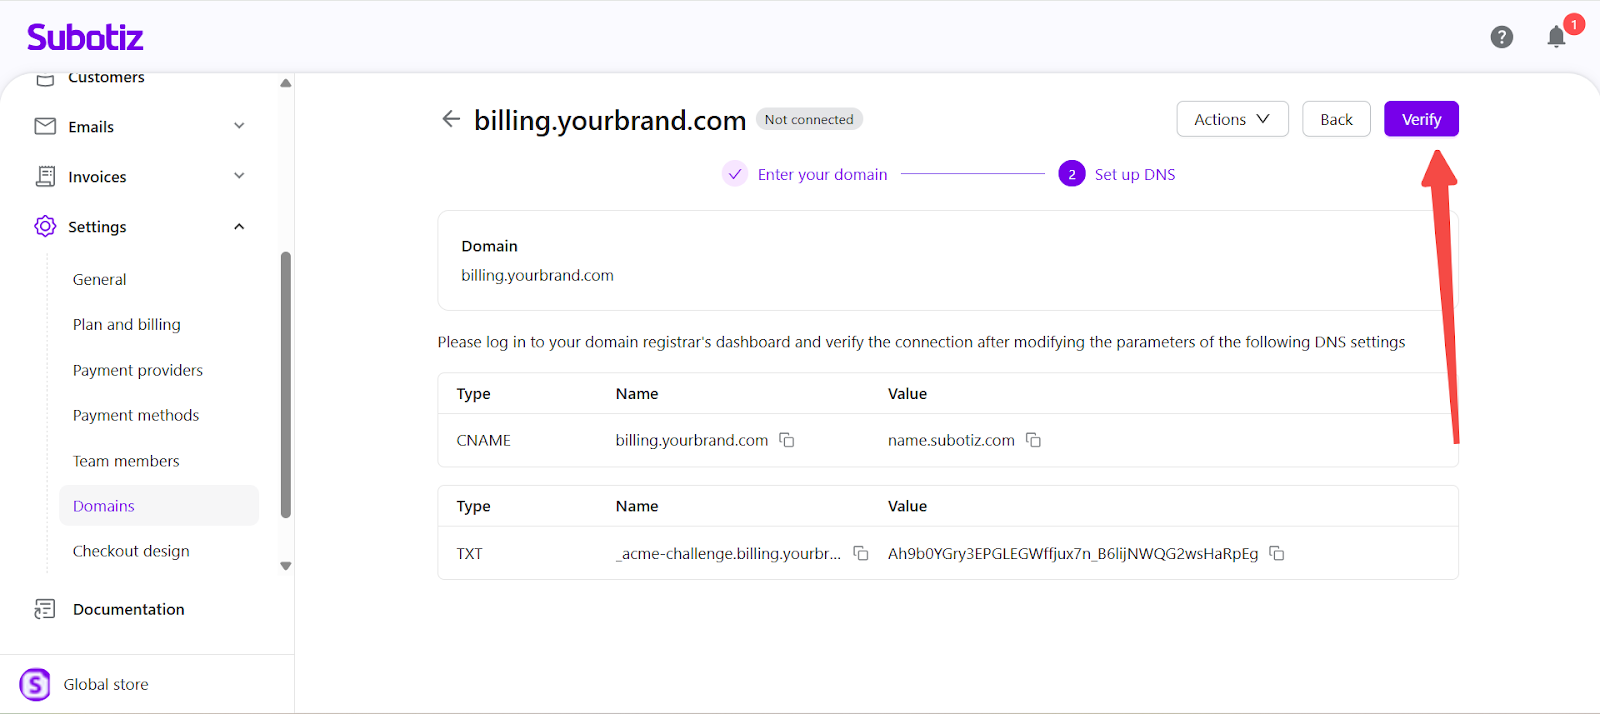
- Verify domain: Return to Settings > Domains and click Verify.
- Once Subotiz detects the correct DNS records, your domain status changes to Connected.
- An SSL certificate is automatically issued and activated.
- All checkout and customer portal URLs begin using your verified domain.
Note: If verification fails, ensure your DNS records match exactly, with no extra characters or conflicting entries.
View or Remove Domains
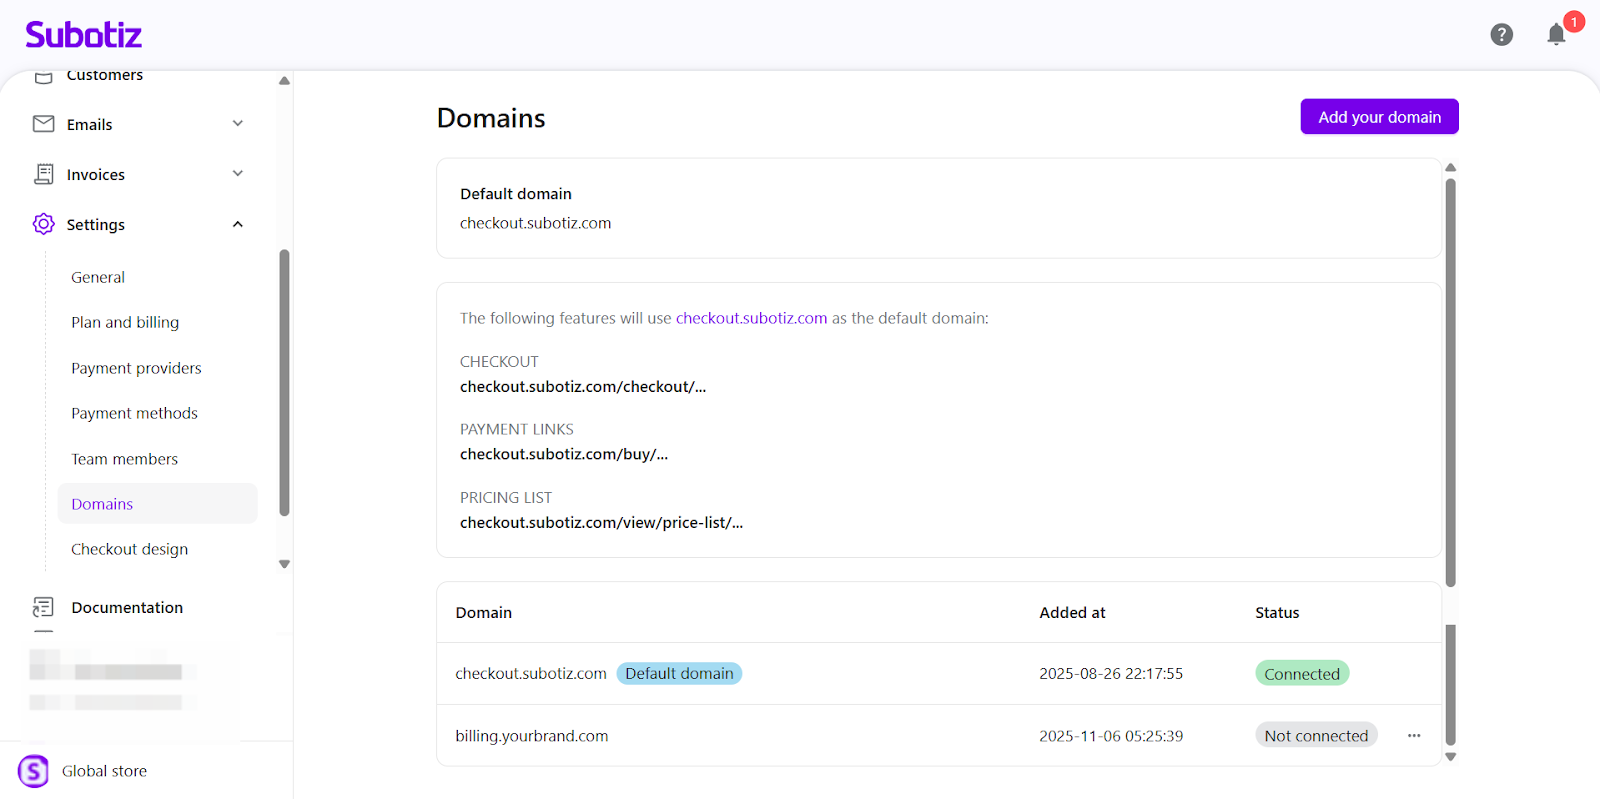
- Manage existing domains: Go to Settings > Domains to view all connected and pending domains.
- Default domain: The system-generated Subotiz domain.
- Custom domains: Any connected or pending subdomains.
- Connection status: Indicates whether each domain is verified and active.
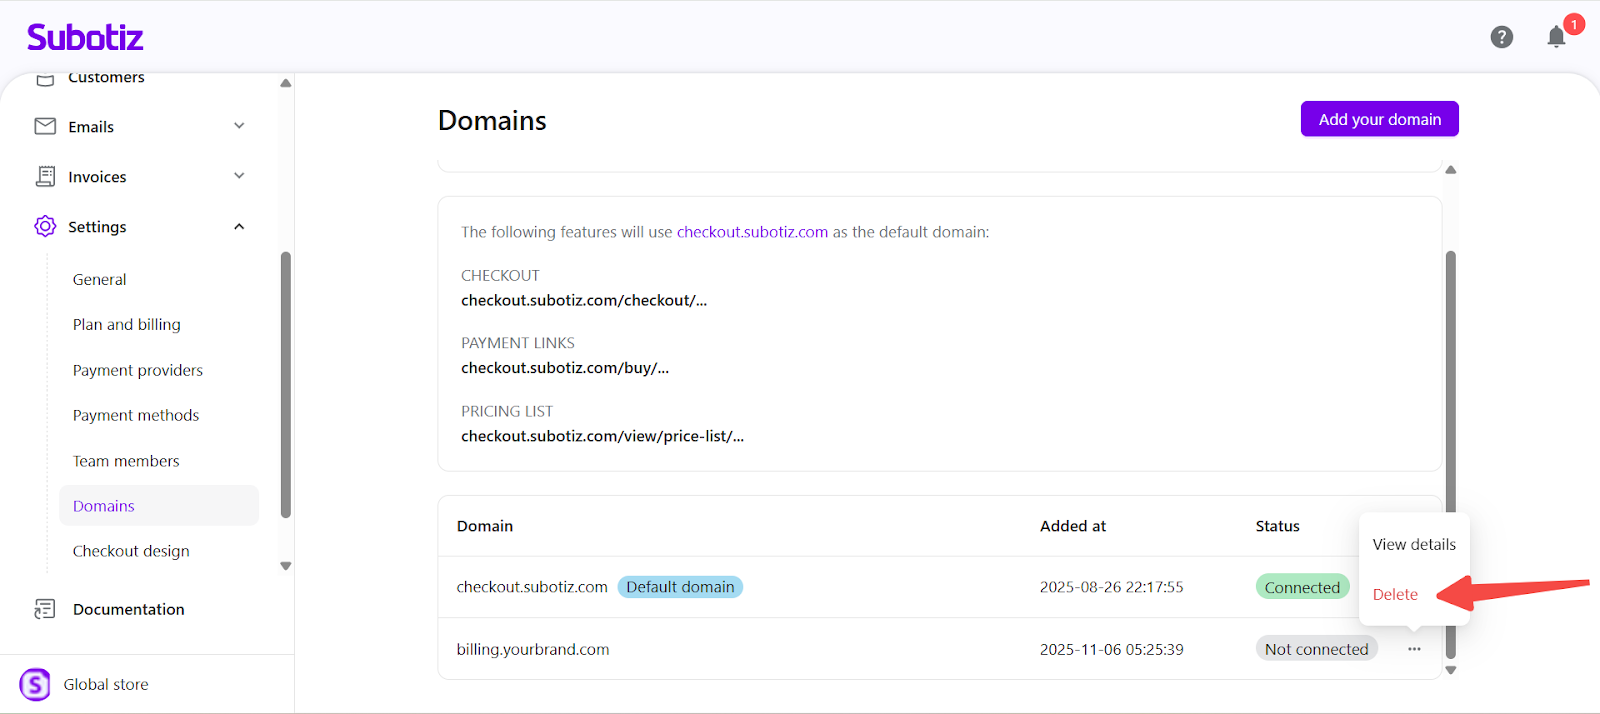
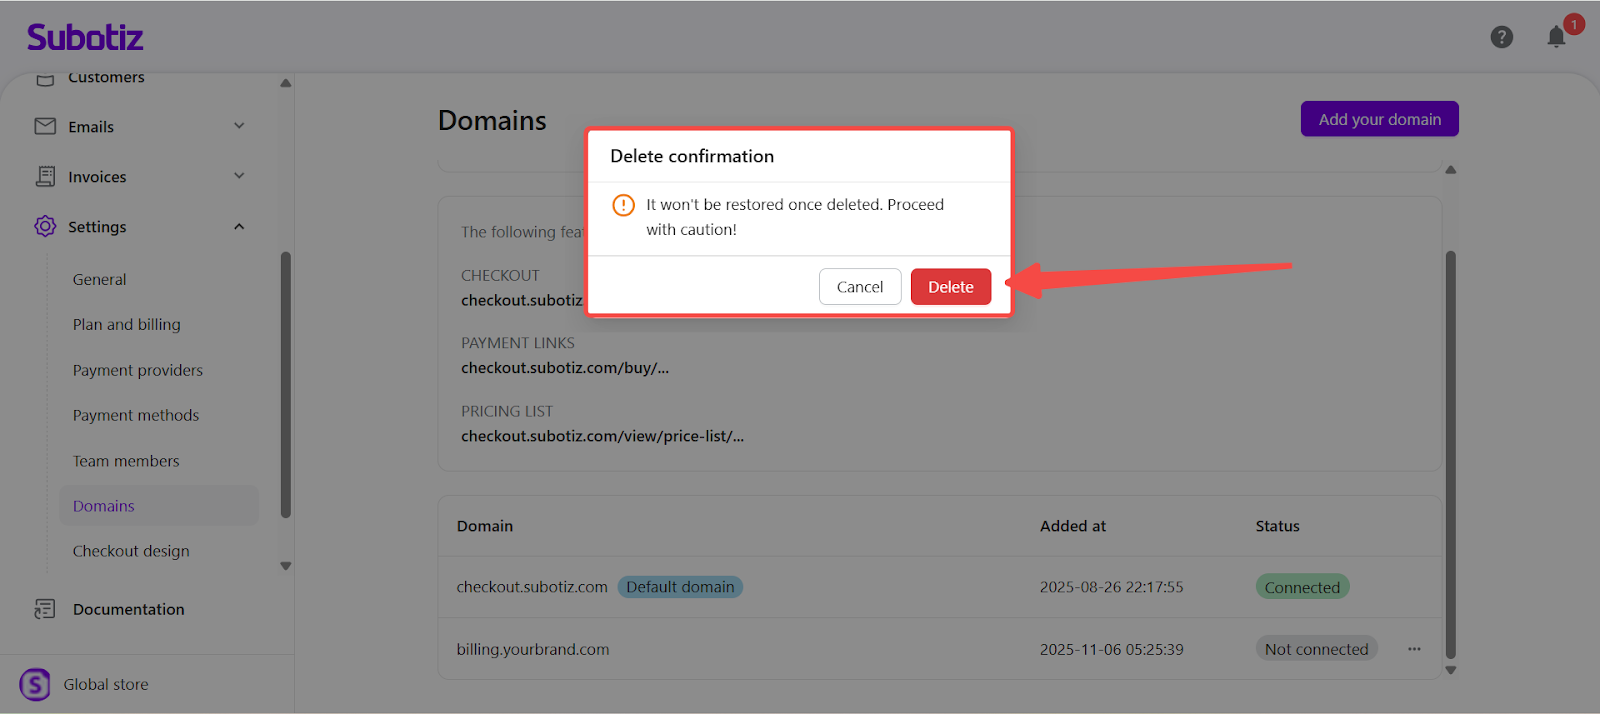
- To remove a domain: Click More actions (...) beside the target domain. Confirm deletion. The workspace will revert to the default Subotiz domain immediately.
Best Practices
- Use a dedicated subdomain such as
billing.,pay., orportal.for clear identification. - Wait for full DNS propagation before verifying.
- Remove or update old DNS records to avoid conflicts.
- Test your checkout and portal pages after activation to confirm HTTPS and redirection work properly.
Limitations
- Only subdomains (not root domains) are supported.
- Each workspace can have one active verified domain at a time.
- DNS propagation and SSL activation may take several hours depending on your provider.
Adding and managing a custom domain in Subotiz provides your customers with a consistent, secure, and professional experience under your brand. Once verified, Subotiz automatically manages SSL security and renewals, allowing you to focus on your business while maintaining full brand control across all hosted pages.