This article helps you understand the back-end checkout flow and get a step-by-step guide on how to integrate the hosted checkout into your website or application, including passing settings and items, and prefilling customer information.
Checkout flow
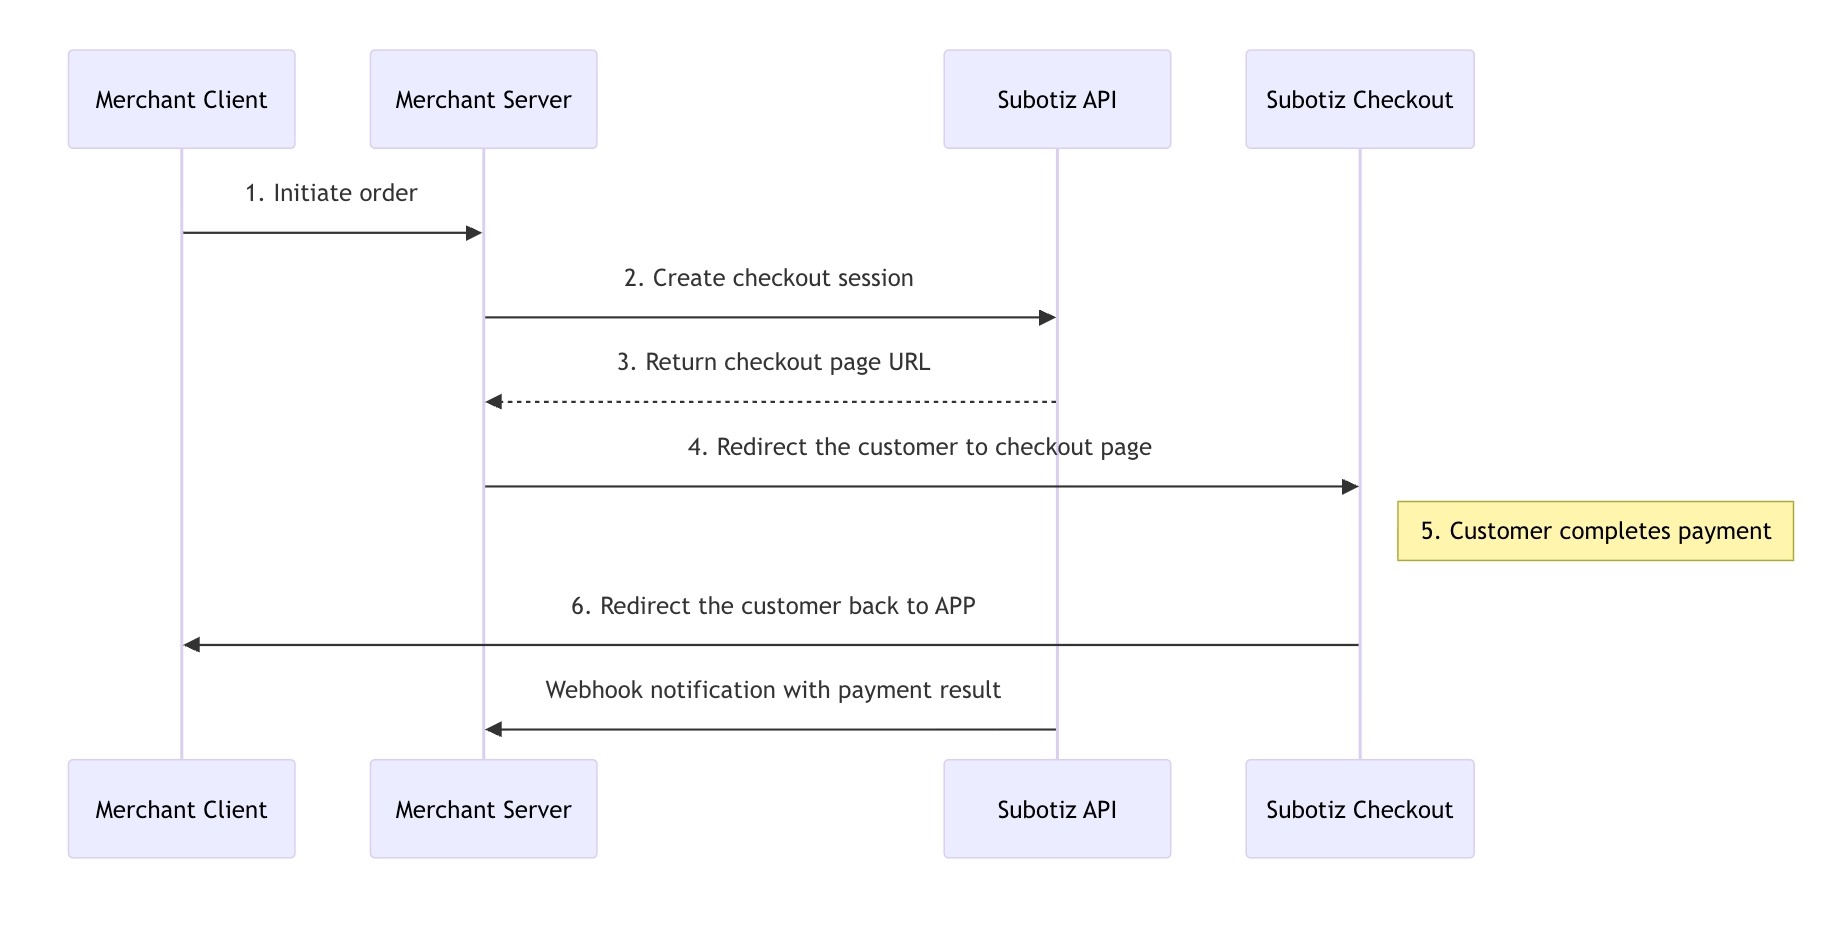
- When customers are about to make a purchase, the checkout request will be initiated from your Client to your Server. Then the Server will create a checkout session using the Subotiz API.
- The checkout session created above provides a URL, the Subotiz-hosted checkout page, which merchants can redirect customers to.
- Customers fill in payment information and complete the checkout on the Subotiz-hosted checkout page.
- Subotiz notifies your Server of the payment result by webhook.
Before you begin
Create products and prices
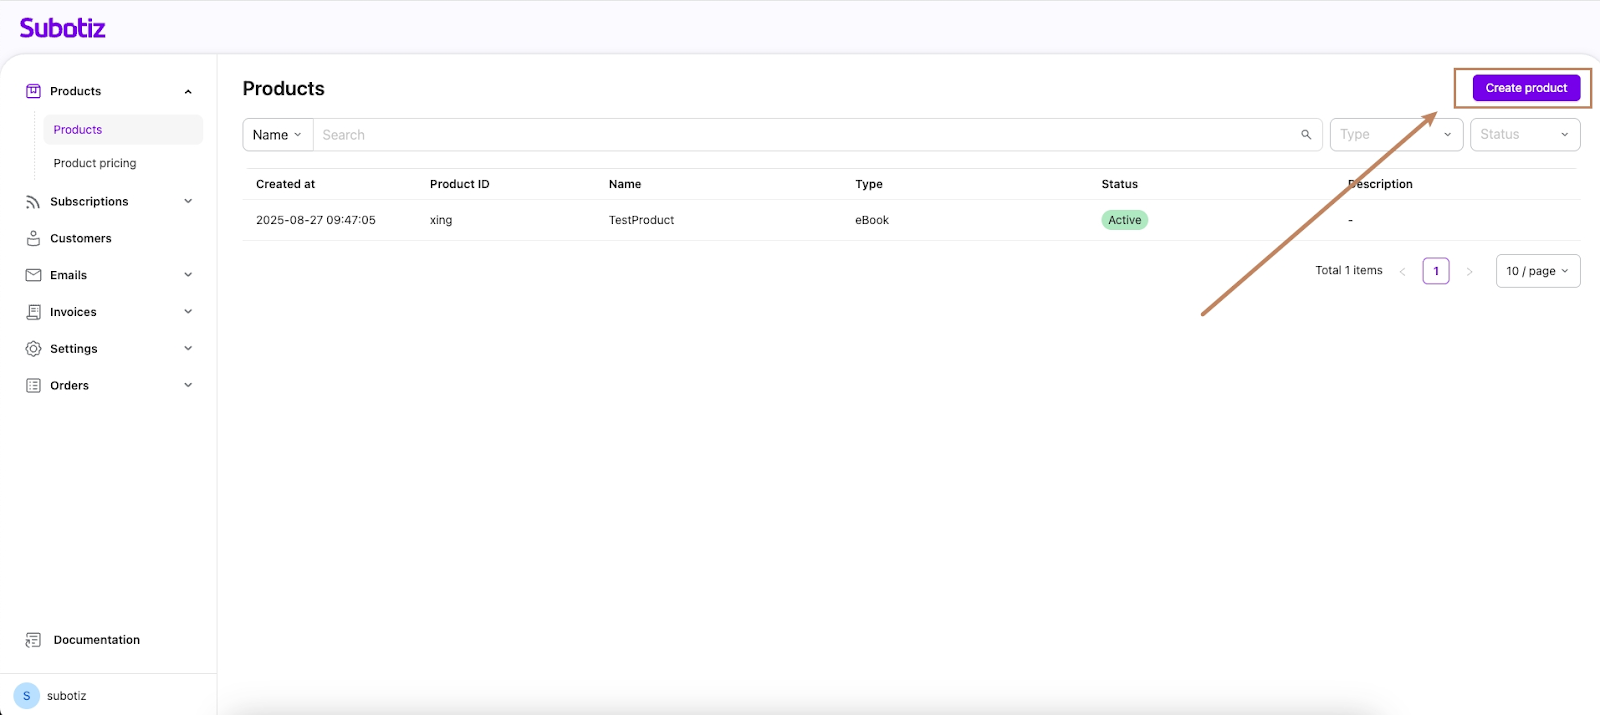
Subotiz provides the platform to create products and product pricing, whose information will be saved on the Server. However, the checkout session works with the
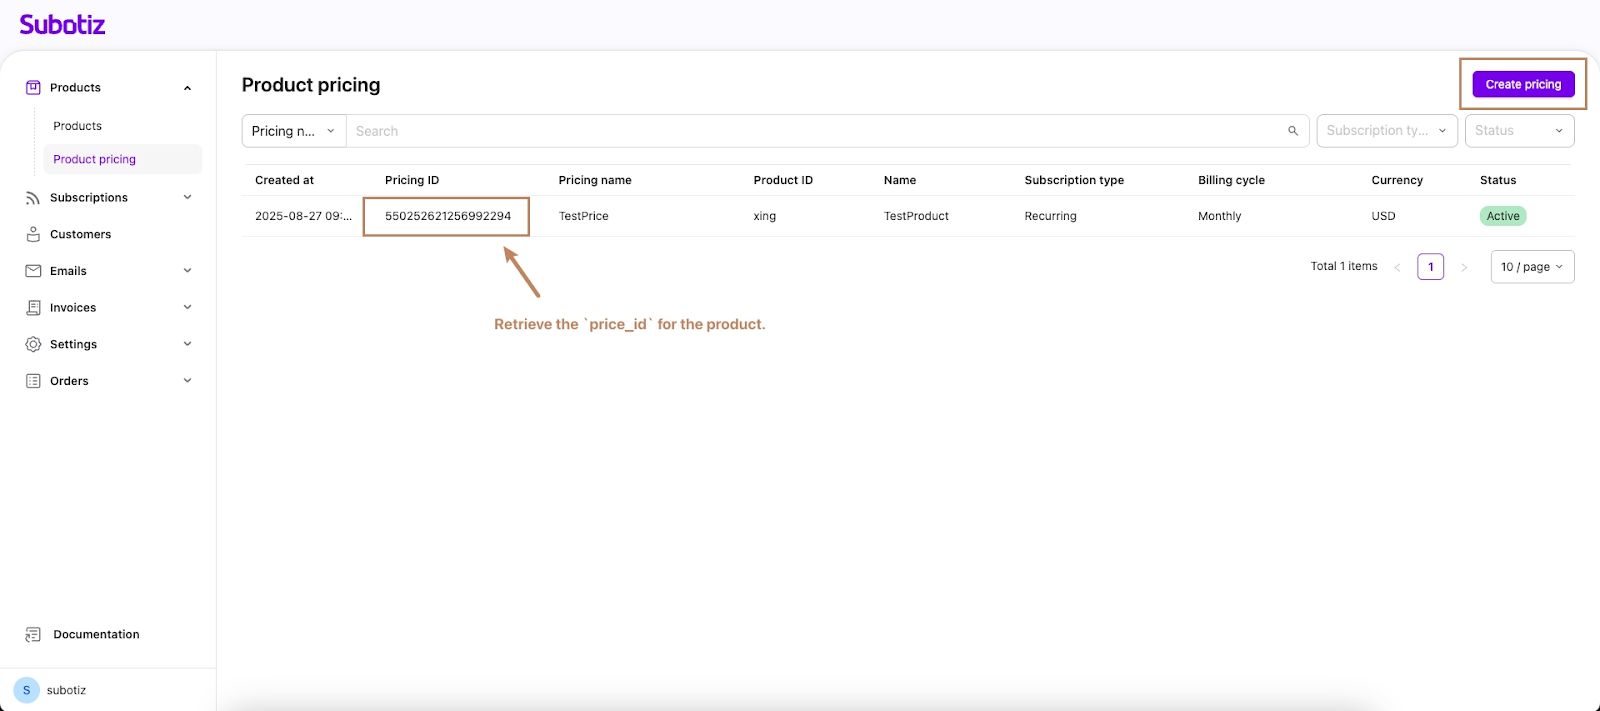
pricing_id of product pricing to dynamically obtain the product information, so you'll need to create a product and at least one related product pricing to pass to your checkout.- Create a product:
- Create product pricing:
Integration process
-
Provide success and cancel URLs: Your application needs to prepare two publicly accessible page URLs:
- A URL for customers to be redirected to after a successful payment.
- A URL for customers to be redirected to if they cancel the payment.
Note: The same URL can be used for both purposes.
- Provide a webhook endpoint: Create an endpoint to receive events for your account. When an event occurs (e.g., a successful payment), Subotiz will send an HTTPS POST request containing a JSON-formatted event object to the Webhook endpoint. You can use these events to keep your system's business data in sync.
- Provide an entry point for creating a checkout session: Your client-side application needs an entry point to initiate checkout, such as a "Checkout" button on an order preview page. When a customer clicks this button, your server should call the Subotiz API to create a Checkout Session. Modify the API call parameters based on the order information. The parameters passed when creating the Checkout Session determine what the customer sees on the checkout page (e.g., product info, order price). After the API responds, redirect the customer to the Subotiz checkout page.
Example: Creating a checkout session in hosted mode
curl --location 'https://api.subotiz.com/api/v1/session' \
--header 'Content-Type: application/json' \
--header 'Hub-Timestamp: 1756513740897' \
--header 'Hub-Access-No: 77d52a21dc032b4' \
--header 'Request-Id: 9913dca8-90f8-4e20-98bc-565f0222ffa8' \
--header 'Hub-Signature: 75c8bfd1cac3c68d2bcf05bc36c913e36577d8d97bc08fba9ce67551808480eb'
--data-raw '{
                "access_no":       "77d52a21dc032b4",
                "sub_merchant_id": "2816433",
                "order_id":        "123e4567-zzzaa20daw11a",
    "payer_id": "customer_id_0012",
                "line_items": [
                        {
                                "price_id": "543321366326164797",
                                "quantity": "1"
                        }
    ],
                "email":           "zhangsan@subotiz.com",
                "callback_url": "https://webhook.site/a5ea4995-8438-4ba4-affe-0f95ffac26ss",
    "integration_method": "hosted",
    "cancel_url": "https://www.subotiz.com",
    "return_url": "https://www.subotiz.com"
        }'
Key Parameters:
order_id: Your platform's internal order ID, used for subsequent business data correlation.integration_method: Set tohostedto use the hosted page integration method.cancel_url: The URL the customer is redirected to if they cancel payment on the Subotiz Checkout page.return_url: The URL the customer is redirected to after a successful payment on the Subotiz Checkout page.
Upon successful checkout, Subotiz will redirect the customer back to your success page (
return_url), completing a full payment cycle. Additionally, Subotiz will send a Webhook notification to your server endpoint, allowing you to handle post-payment logic—such as updating order status or activating subscriptions—on your admin.