The Add sender domain feature in Subotiz allows merchants to verify a branded sender domain for sending system emails, including transactional and marketing emails. This improves deliverability, enhances inbox placement, and protects against spoofing, helping build long-term customer trust.
Setting Up Sender Domain
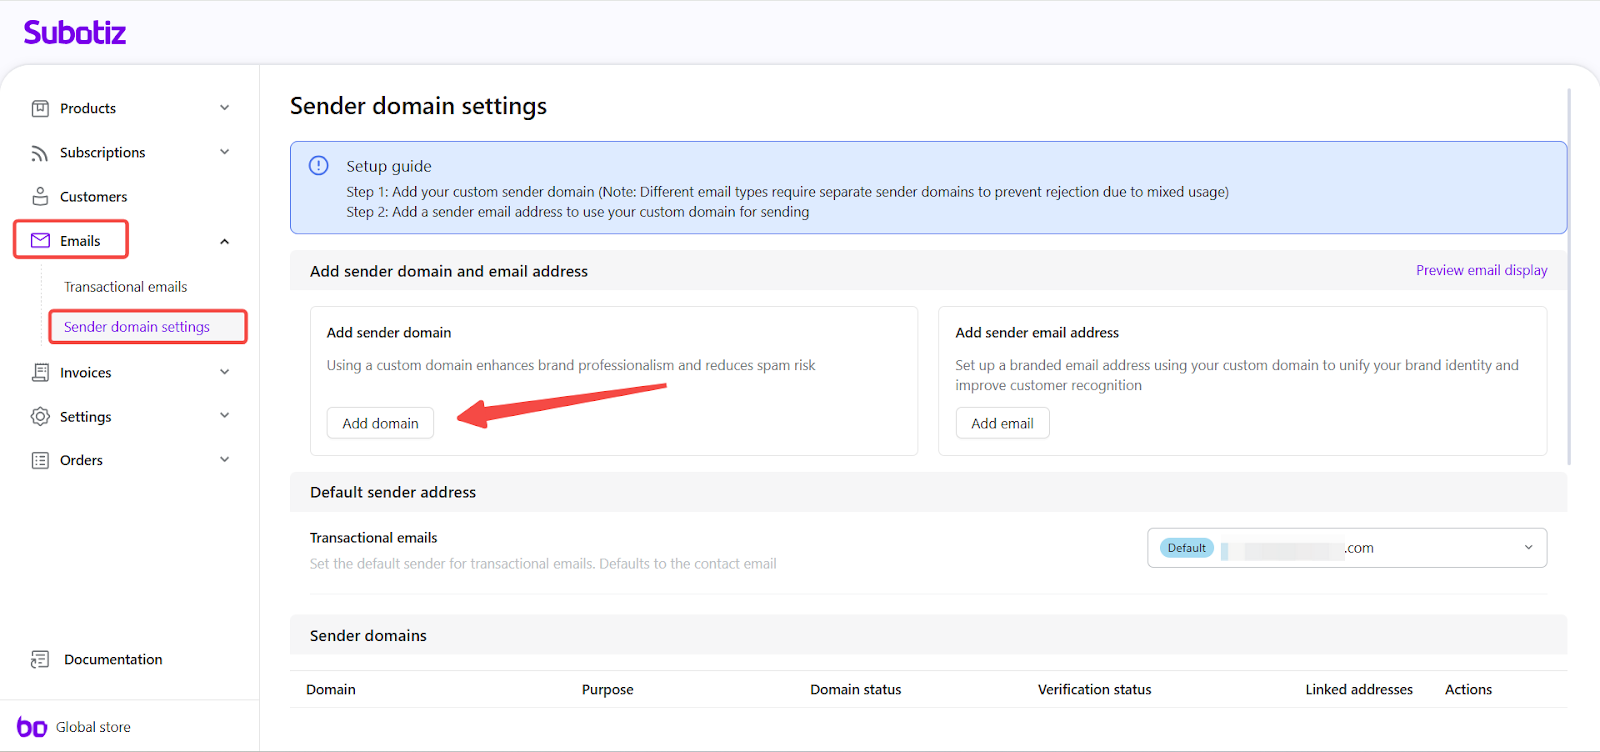
- Access Sender domain settings: Go to Emails > Sender domain settings in the Subotiz admin, then click Add domain.
- Enter a subdomain: In the Domain settings step, enter a subdomain in the format mail.yourdomain.com.
- Do not enter your store URL or https://.
- Example: If your store domain is shopdemo.com, enter mail.shopdemo.com.
- Reasons for using a subdomain:
- Protect primary domain reputation: Transactional or marketing emails may face spam complaints, bounces, or blacklisting. By using a subdomain, risks are isolated so the main domain is not directly impacted.
- Improve deliverability: Subdomains allow dedicated SPF, DKIM, and DMARC configuration, making it easier for system emails to pass authentication checks and reach customer inboxes.
Click Next to proceed.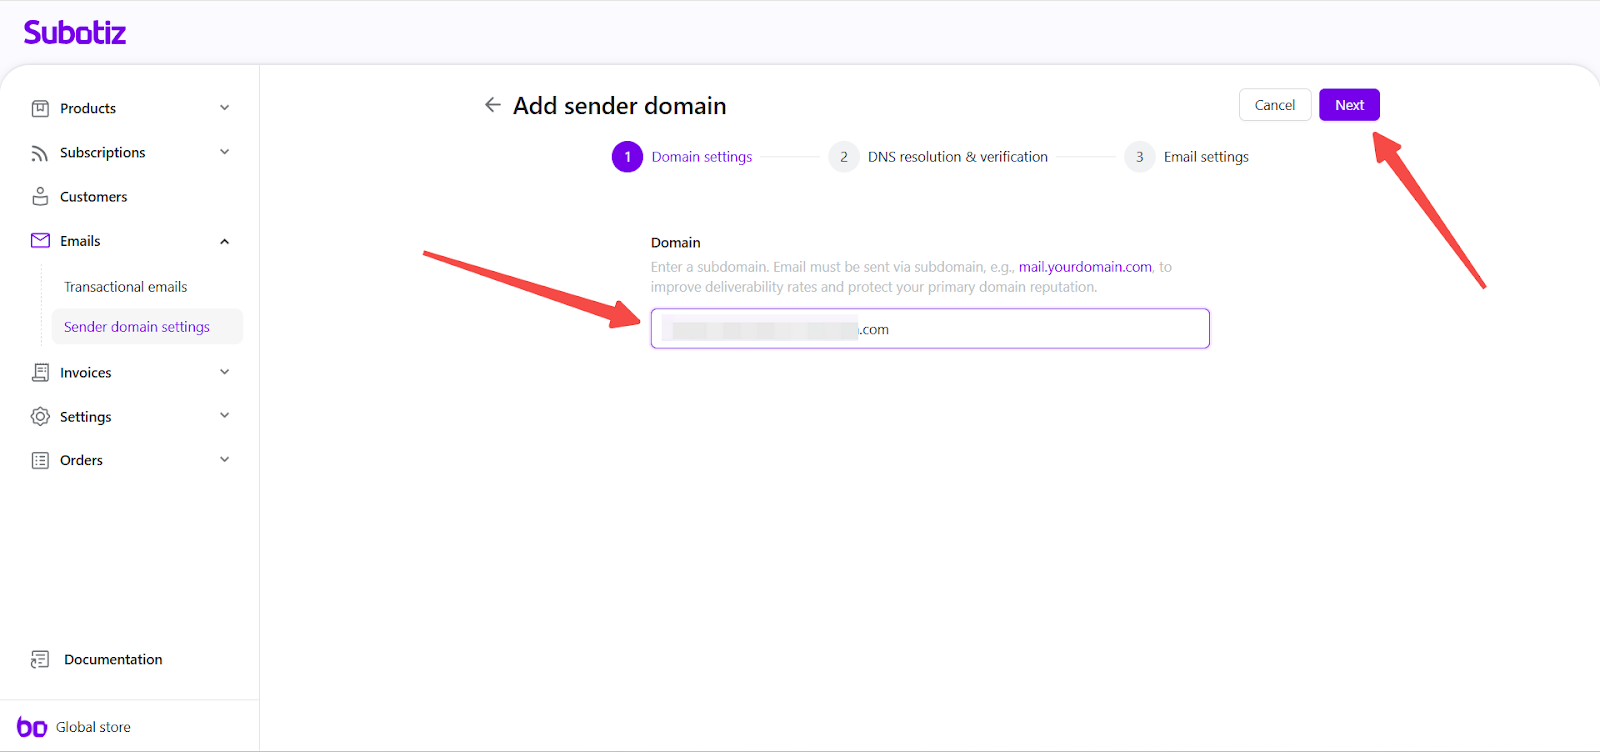
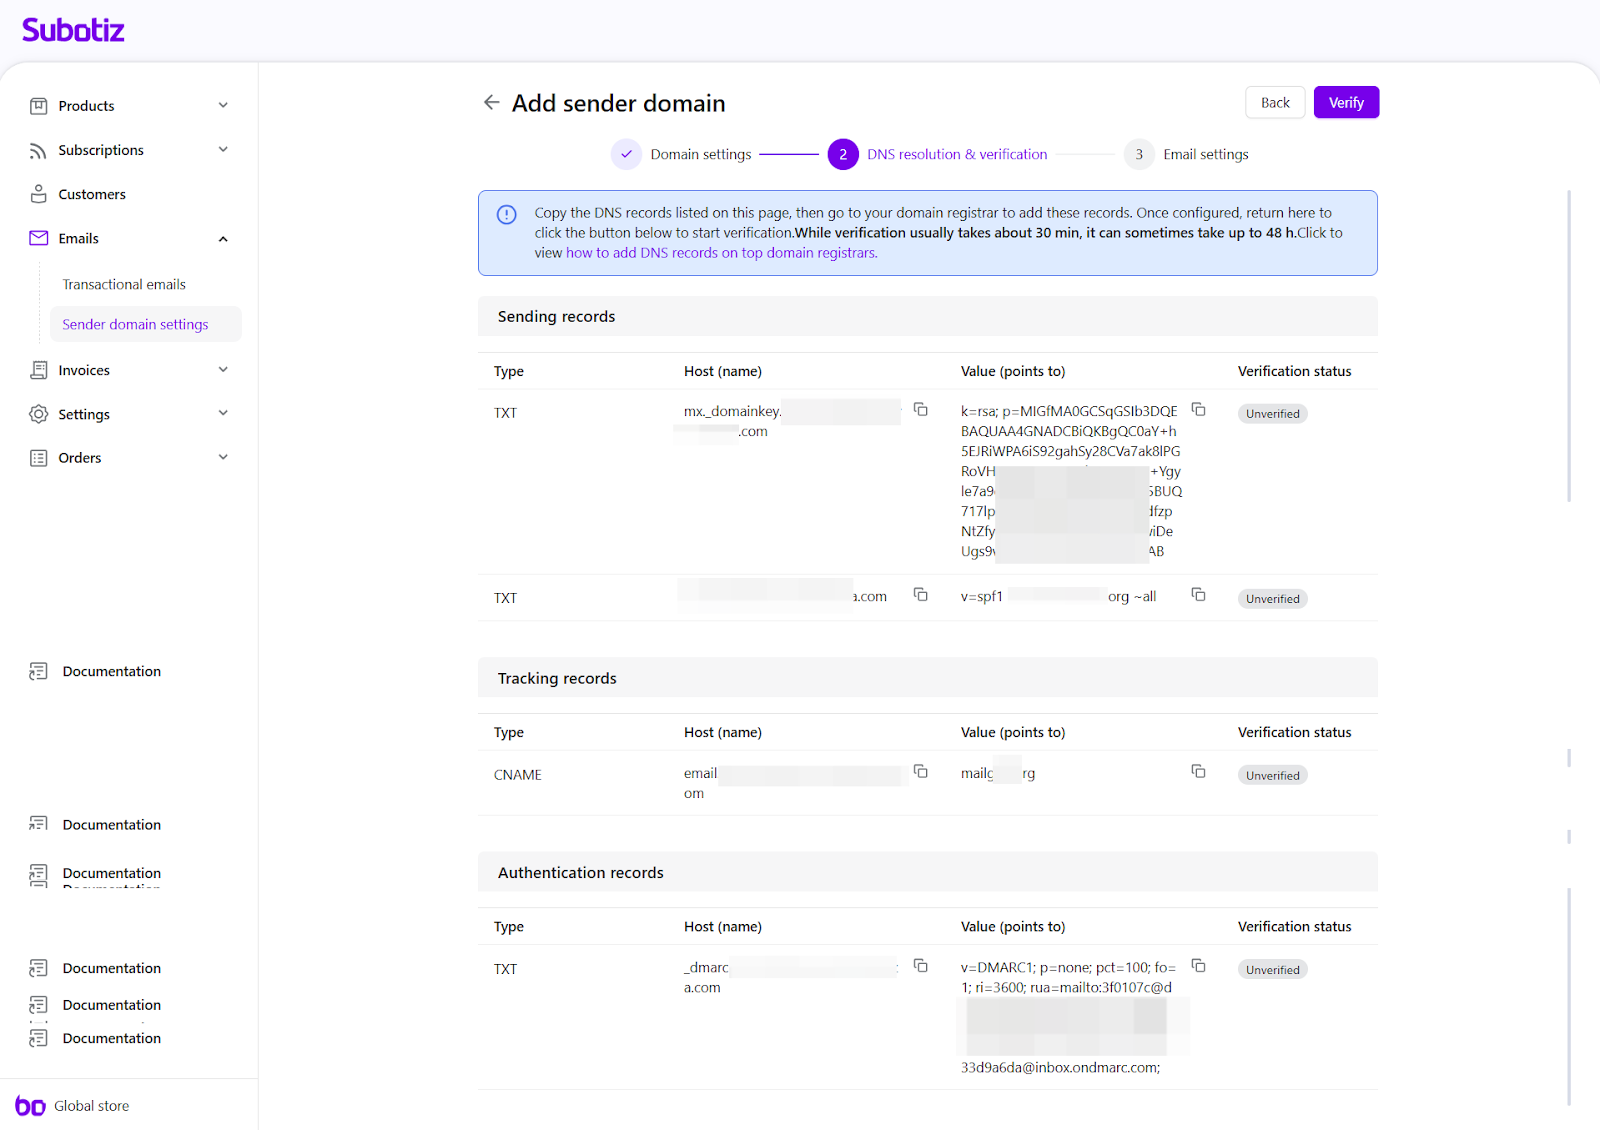
- Configure DNS records: In the DNS resolution & verification step, copy the DNS records displayed in Subotiz and add them at your domain registrar.
- Sending records (TXT): Add TXT values for SPF and DKIM authentication to authorize Subotiz to send system emails on your behalf.
- Tracking records (CNAME): Add the CNAME record to allow tracking and reporting of email delivery.
- Authentication records (TXT): Add the DMARC record to protect your domain from spoofing and unauthorized use.
- Important: Copy each record exactly as provided. Do not add spaces, modify values, or change the Host field.
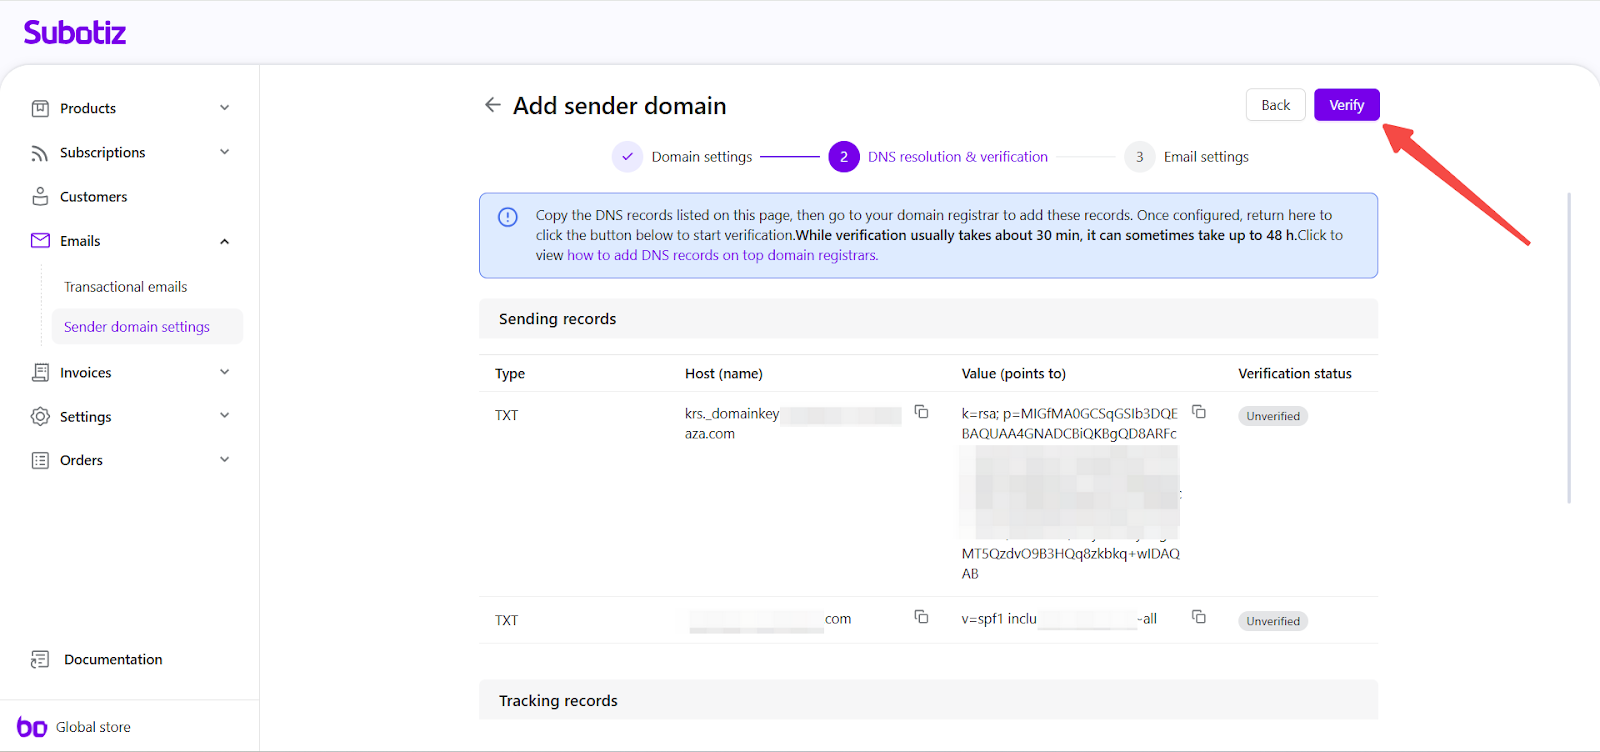
After saving the DNS changes, return to Subotiz.
- DNS updates usually complete within 30 minutes, but in some cases may take up to 48 hours to propagate.
- If all DNS records are confirmed correct but repeated verification attempts still fail, the DNS changes may not have fully propagated. In this case, wait for some time before retrying verification.
- Verify the domain: After DNS records are active, click Verify in Subotiz. When verification is successful, the domain status updates to Verified and appears in the sender domains list.
- Complete email settings: Once the domain is verified, you can configure sender email addresses in two ways:
- Option A: Return to the Sender domain settings page to add branded sender email addresses.
- Option B: Add sender addresses directly in the DNS verification step (Step 3) after the domain status updates to Verified.
A successfully configured domain displays as Verified and Active. The Linked addresses column shows how many sender email addresses are created under each domain.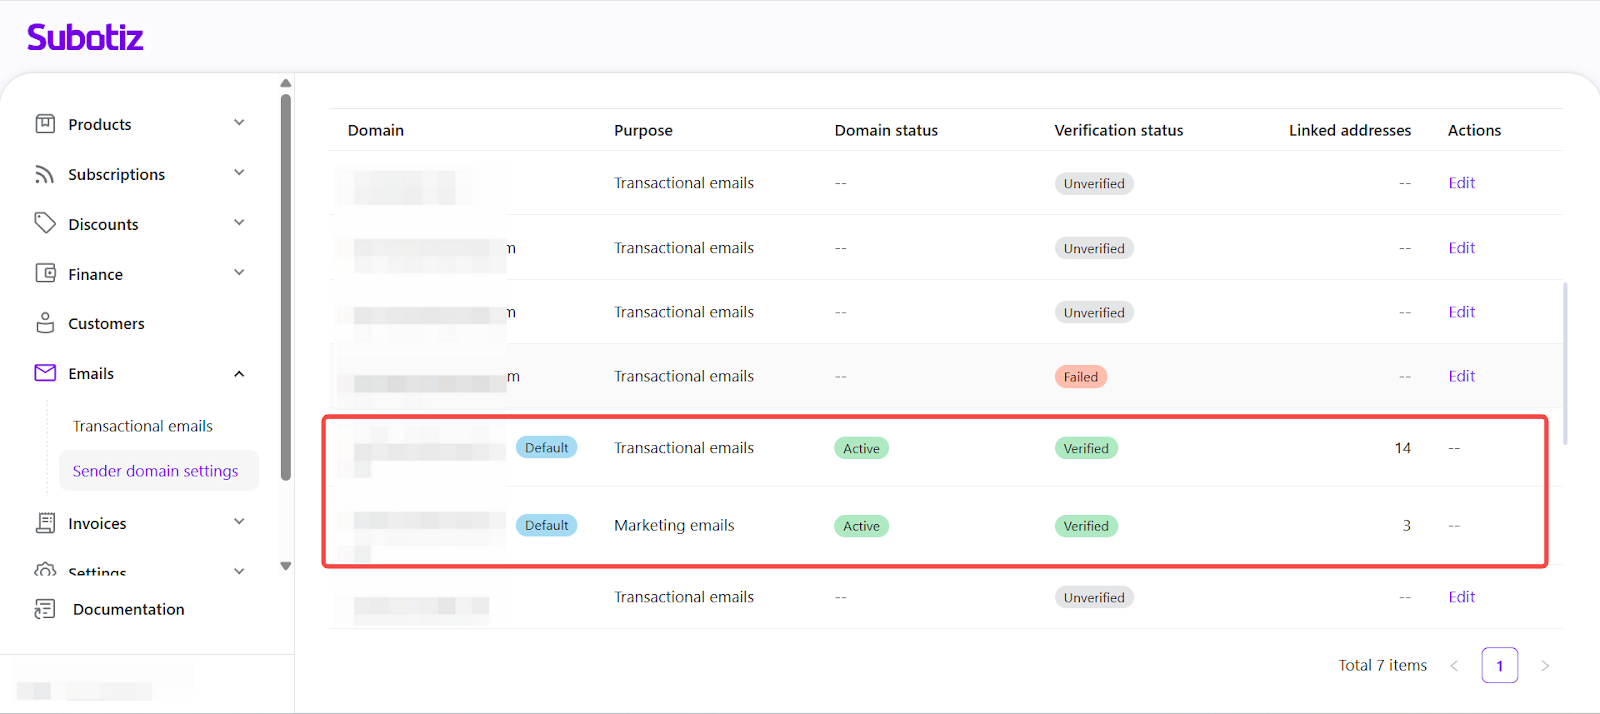
Best Practices
- Use a dedicated subdomain: Configure a separate subdomain (e.g., mail.yourdomain.com) for system emails, including transactional and marketing emails.
- Verify DNS changes promptly: Verify the domain soon after DNS updates to avoid delivery delays.
- Secure registrar access: Keep your domain registrar account secure when managing SPF, DKIM, and DMARC records.
Adding and verifying a sender domain allows Subotiz to send authenticated system emails, including transactional and marketing emails, on your behalf, improving inbox placement and protecting your brand reputation. This setup provides customers with a consistent, trustworthy experience across all email communications.